IDPS as a VNF
IDPS as a VNF
In OpenStack environments with a network functions virtualization infrastructure (NFVI) enabled you can run an IDPS instance as a virtualized network function (VNF). VNFs are building blocks that you can use to create a scalable service that includes a sequence of virtual functions in service chaining.
To enable IDPS as a VNF:
Once IDPS VM is configured and verified, upload the IDPS VM image to your cloud environment using OpenStack Dashboard. QCOW2 or VMDK formats of the image are preferable.
Go to the Contrail web UI. For example: https://172.16.0.3:8143/
Open the Service Templates panel in the Configure tab.
Create an IPS template service.
Select the service mode for your service:
- In-Network or routed mode
Service VM instance is between at least two networks and packets are routed. Examples include NAT, Layer 3 firewall, load balancer, HTTP proxy, and so on.
- In-Network NAT
Similar to in-network mode. However, return traffic does not need to be routed to the source network.
In-network-natmode is particularly useful for NAT service.
- Transparent or bridge mode
Is transparent for communication between instances and packets are not modified. The
transparentmode fits L2 firewall and IDPS.
Specify the number of interfaces for a service in Service Type.
- For
Firewalltype Contrail allocates at least two interfaces: ingress and egress. - For
Analyzertype - at least one interface is needed.
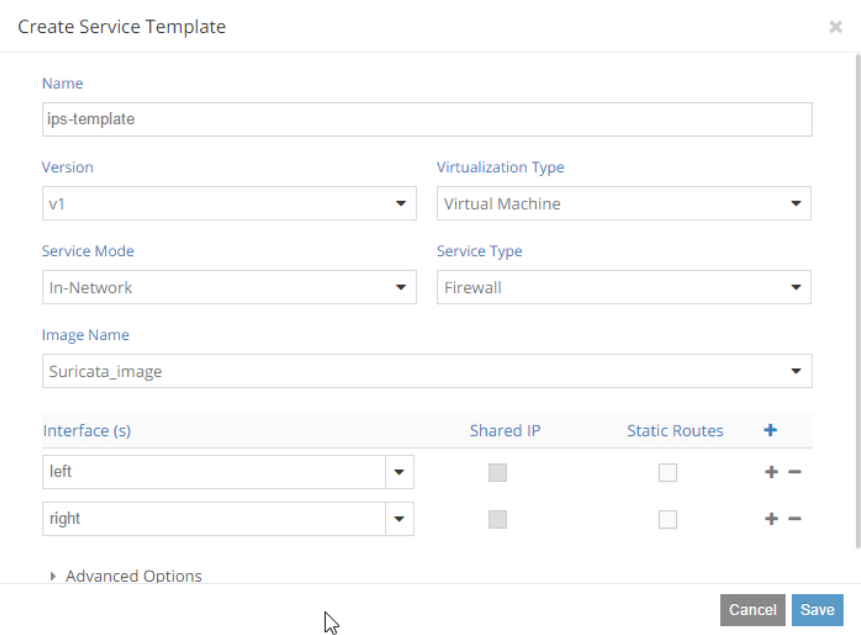
- For
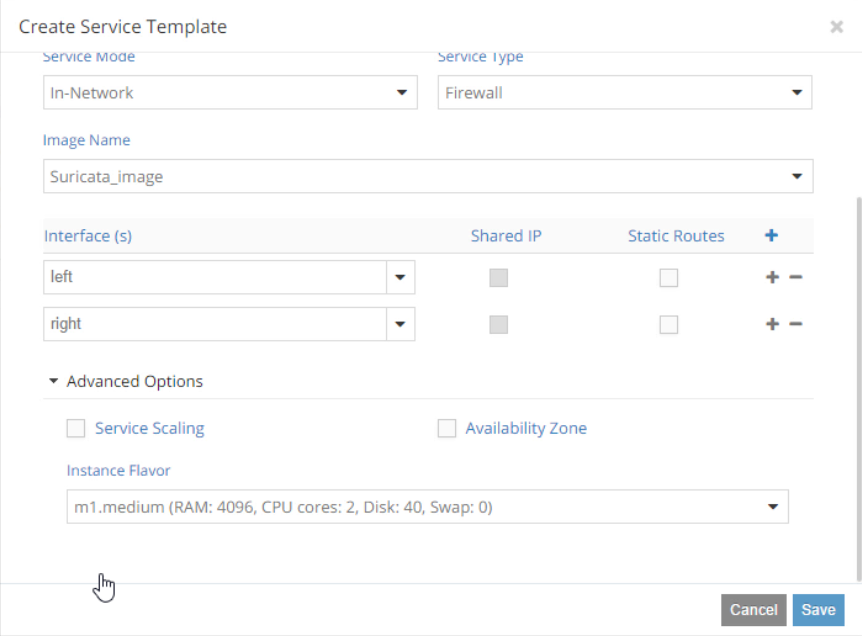
In Advanced Options you can enable Service Scaling, select Availability Zone for your service instances, and select an instance flavor.
In Service instances panel, create an
ips-instanceservice instance based on the available service template and connect network interfaces to internal and external networks. As a result,ips-instancewill act as an alternative router connecting two networks.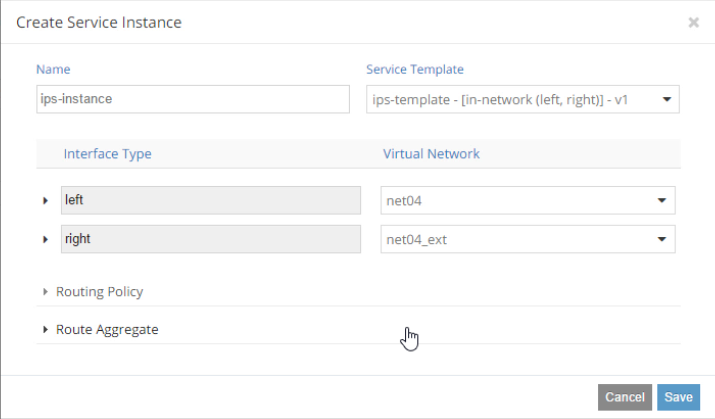
Go to the Networking->Policies panel to create a service policy. The
ips-policytells Contrail to pass any traffic between internal and external to theips-instanceservice instance.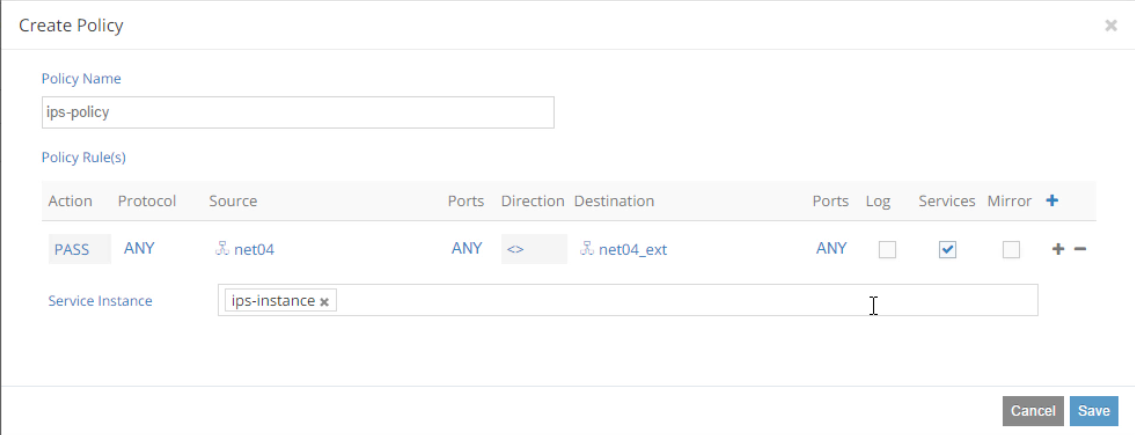
Note
OpenContrail provides traffic mirroring feature as well.
Assign the created
ips-policypolicy to the affected networks internal and external in the Networking->Networks panel.Test your service chaining:
Create a VM
TestVMfrom where you can download malicious content from external network.Configure iptables to route traffic between internal and external traffic (a router mode).
Note
You can also test your IPS service instance in a bridge mode by installing it between the default router and external network.
The current network topology with
ips-instanceand theTestVMrunning in the internal network will look like: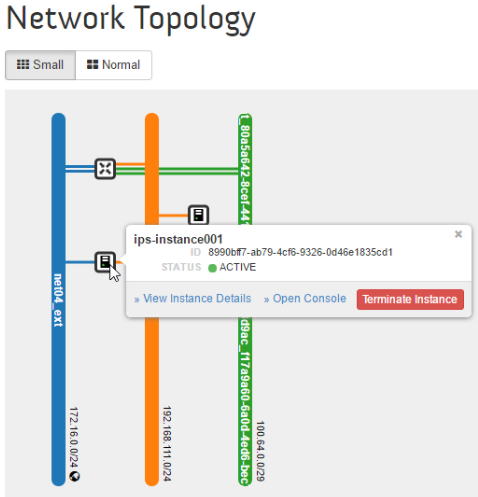
Verify if Contrail correctly direct traffic between networks to the service instance.
From the
TestVMping the external network gateway. For example:ping 172.16.0.1
On the
ips-instanceVM, start tcpdump:sudo tcpdump -i eth0
In the
ips-instanceVM, verify that you can see ICMP packets going between two networks:
Set up a web server in external network and create a test file with the word
Alarminside.Download the test file from
TestVM. For example:curl http://172.16.0.30:8080/testIn the
ips-instanceVM, view thefast.logto check if Suricata generated the appropriate alert message:Alarm detected:tail -f /etc/suricata/fast.log
See also