Configure native Kubernetes role-based access control
Configure native Kubernetes role-based access control
UCP 3.0 used its own role-based access control (RBAC) for Kubernetes clusters. New in UCP 3.1 is the ability to use native Kubernetes RBAC. The benefits of doing this are:
- Many ecosystem applications and integrations expect Kubernetes RBAC as a part of their YAML files to provide access to service accounts.
- Organizations planning to run UCP both on-premises as well as in hosted cloud services want to run Kubernetes applications on both sets of environments, without manually changing RBAC in their YAML file.
Kubernetes RBAC is turned on by default for Kubernetes clusters when customers upgrade to UCP 3.1.
Starting with UCP 3.1, Kubernetes and Swarm roles have separate views. You can view all the roles for a particular cluster under Access Control then Roles. Select Kubernetes or Swarm to view the specific roles for each.
Creating roles
You create Kubernetes roles either through the CLI using kubectl or
through the UCP web interface.
To create a Kubernetes role in the UCP web interface:
From the UCP UI, select Access Control.
From the left navigation menu, select Roles.
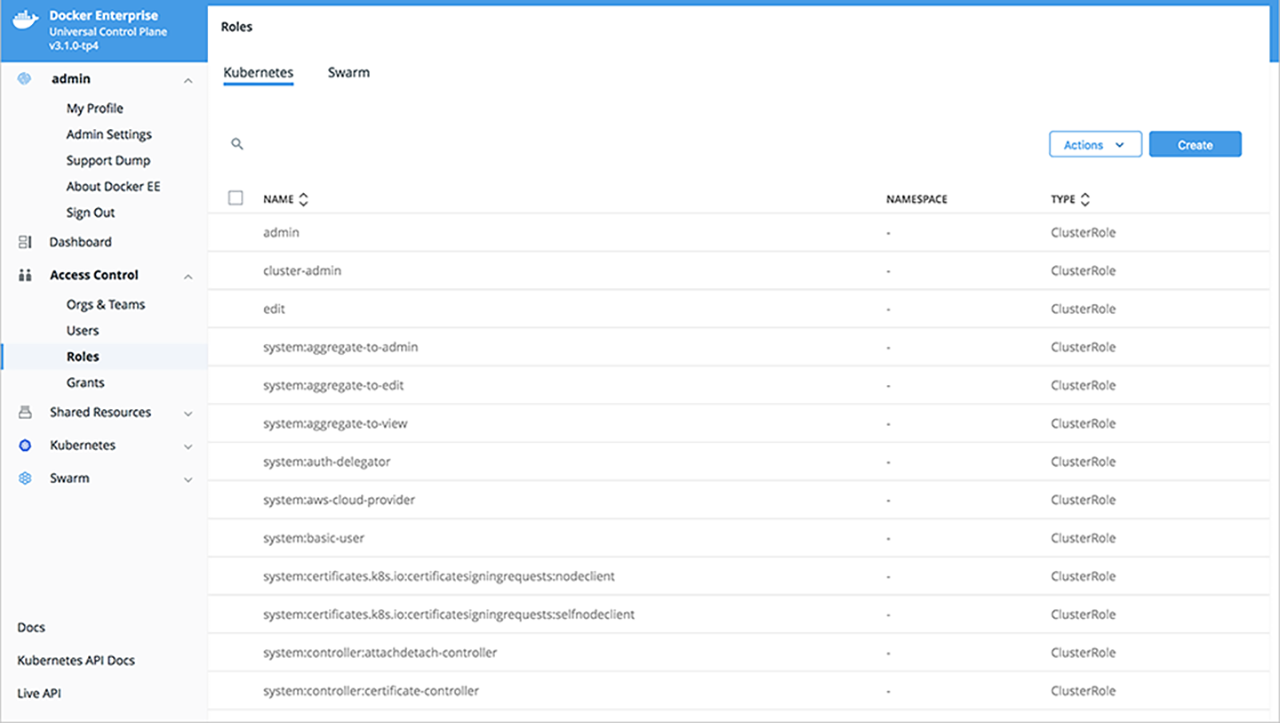
Select the Kubernetes tab at the top of the window.
Select Create to create a Kubernetes role object.
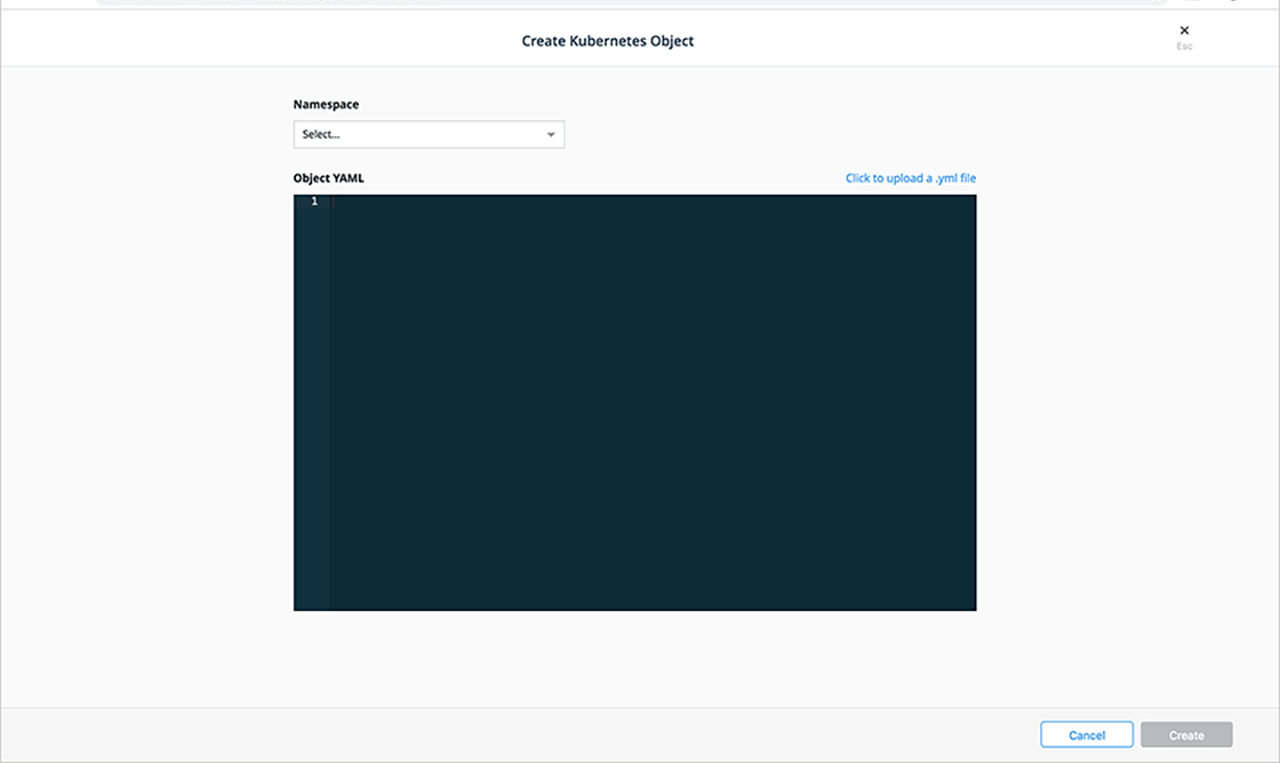
Select a namespace from the Namespace drop-down list. Selecting a specific namespace creates a role for use in that namespace, but selecting all namespaces creates a
ClusterRolewhere you can create rules for cluster-scoped Kubernetes resources as well as namespaced resources.Provide the YAML for the role, either by entering it in the Object YAML editor or select Click to upload a .yml file to choose and upload a .yml file instead.
When you have finished specifying the YAML, Select Create to complete role creation.
Creating role grants
Kubernetes provides two types of role grants:
ClusterRoleBindingwhich applies to all namespacesRoleBindingwhich applies to a specific namespace
To create a grant for a Kubernetes role in the UCP web interface:
From the UCP UI, select Access Control.
From the left navigation menu, select Grants.
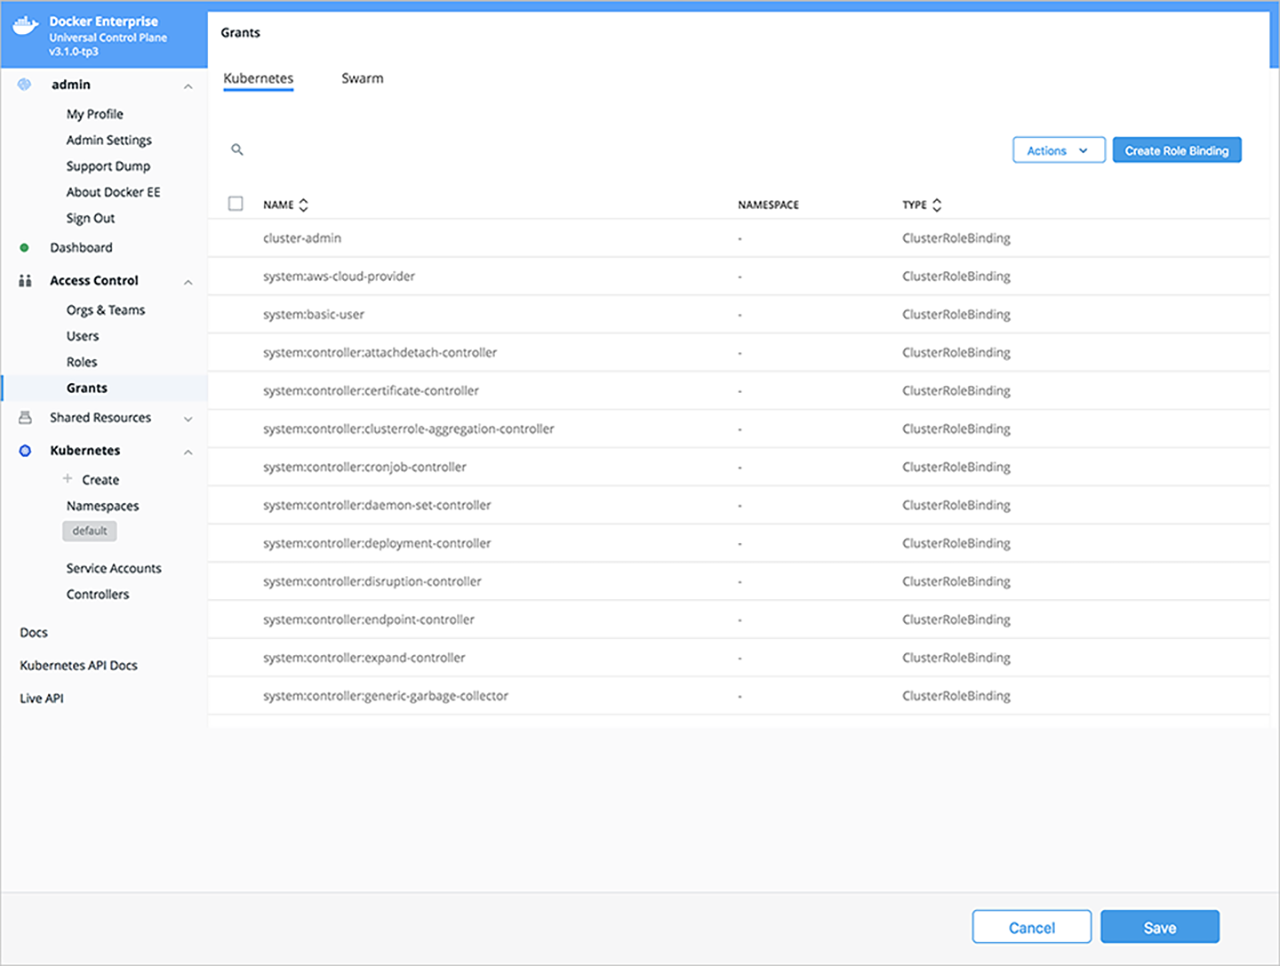
Select the Kubernetes tab at the top of the window. All grants to Kubernetes roles can be viewed in the Kubernetes tab.
Select Create New Grant to start the Create Role Binding wizard and create a new grant for a given user, team or service.
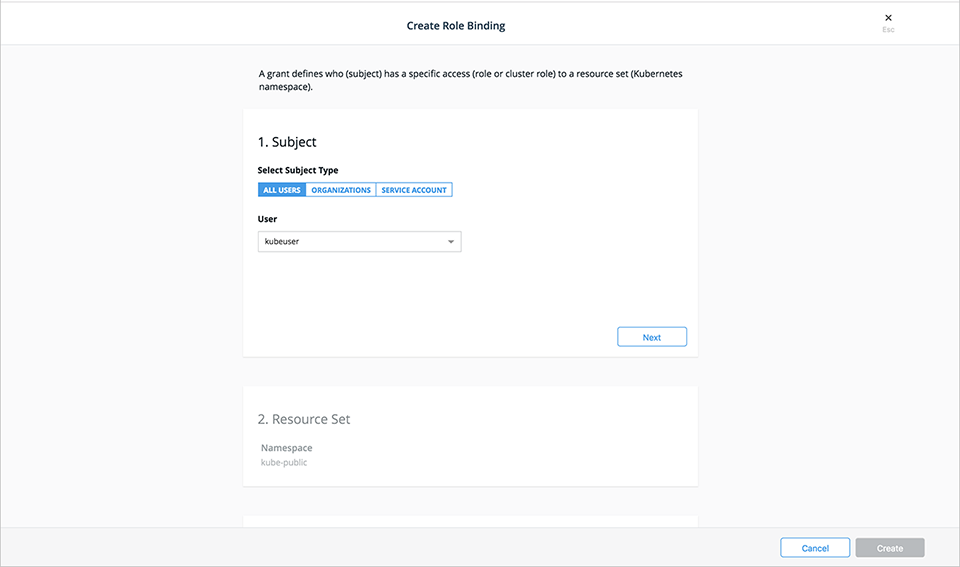
Select the subject type. Your choices are:
- All Users
- Organizations
- Service account
To create a user role binding, select a username from the Users drop-down list then select Next.
Select a resource set for the subject. The default namespace is automatically selected. To use a different namespace, select the Select Namespace button next to the desired namespace. For
Cluster Role Binding, slide the Apply Role Binding to all namespaces selector to the right.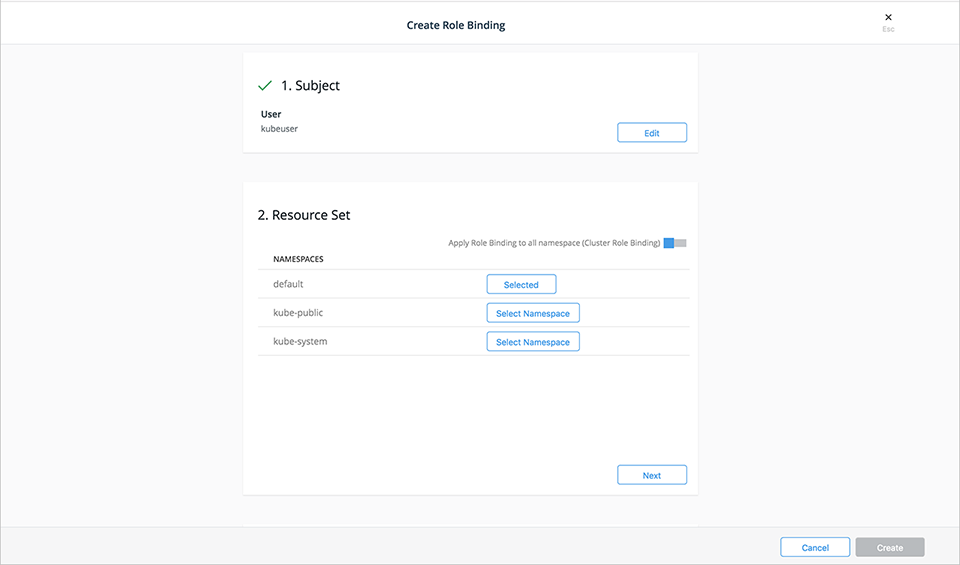
Select Next to continue.
Select the Cluster Role from the drop-down list. If you create a
ClusterRoleBinding(by selecting Apply Role Binding to all namespaces) then you may only select ClusterRoles. If you select a specific namespace, you can choose any role from that namespace or any ClusterRole.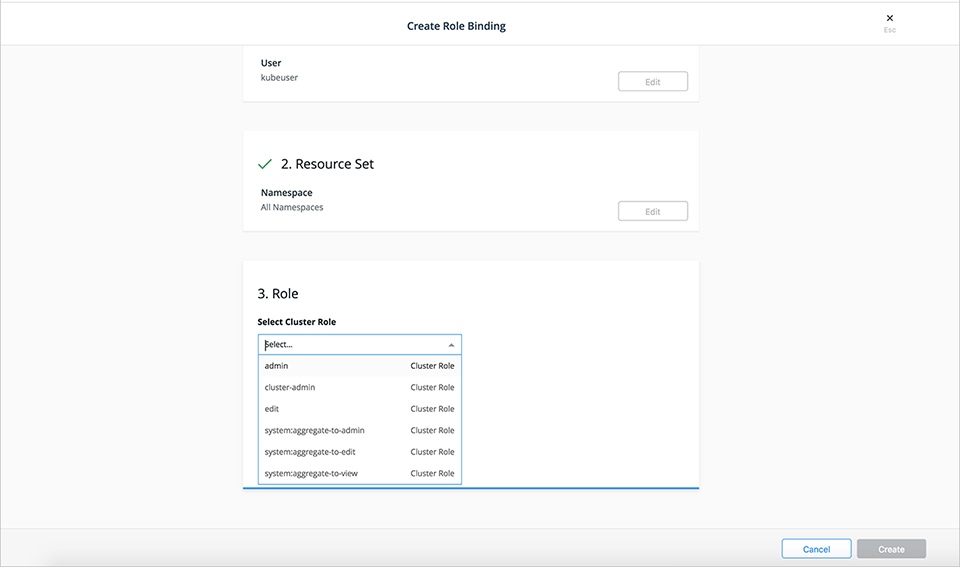
Select Create to complete creating the grant.