Introduction
Warning
In correlation with the end of life (EOL) date for MCR 19.03.8+, Mirantis stopped maintaining this documentation version as of 2022-05-27. The latest MCR product documentation is available here.
This documentation provides information on how to deploy Mirantis Container Runtime (MCR). The documentation is intended to help operators to understand the core concepts of the product.
The information provided in this documentation set is being constantly improved and amended based on the feedback and kind requests from the consumers of MCR.
MCR Overview
Warning
In correlation with the end of life (EOL) date for MCR 19.03.8+, Mirantis stopped maintaining this documentation version as of 2022-05-27. The latest MCR product documentation is available here.
Mirantis Container Runtime (MCR) enables you to power your business-critical applications with the industry-leading enterprise container engine. You can run containers on any platform with a fully supported and highly secure container runtime. MCR provides the core functionality and security compliance needed to enable your container orchestration solution of choice with certified proven support for both Kubernetes and Swarm. The most common use cases include:
- Container orchestration solution
Organisations often have unique container orchestration requirements and may choose to utilise alternative systems to manage their containers. MCR provides freedom to select the best orchestration solution for your needs whilst still ensuring you have a secure, trusted, and supported container runtime to run your mission-critical workloads.
- Secure and validated containers
The challenges in ensuring that the software supply chain is secure does not stop at the container orchestration solution. The key part of securing your container solution is ensuring that only validated and trusted containers can be deployed and run. MCR combined with Mirantis Secure Registry (MSR) gives you the ability to validate and sign your container images to ensure that only approved images can be run in your environment.
- Secure validated encryption
Regulated industries need to meet federal regulations to ensure that appropriate levels of encryption are enabled. MCR provides FIPS 140-2 Validated cryptography ensuring that you meet the highest standards necessary to comply with the federal requirements.
- Multiple operating systems and infrastructures
With the drive towards multi-cloud and hybrid cloud, computing organisations need to support multiple operating systems on multiple platforms. MCR is certified to run on multiple operating systems, including CentOS, RHEL, Ubuntu, and Windows, for consistent runtime regardless of the platform.
MCR Deployment Guide
Warning
In correlation with the end of life (EOL) date for MCR 19.03.8+, Mirantis stopped maintaining this documentation version as of 2022-05-27. The latest MCR product documentation is available here.
Mirantis Container Runtime (MCR) is a client-server application with the following major components:
A server which is a type of long-running program called a daemon process (the dockerd command).
A REST API which specifies interfaces that programs can use to talk to the daemon and instruct it what to do.
A command line interface (CLI) client (the docker command).
MCR can be installed on several Linux distros as well as on Windows.
Install the license
For MCR to recognize your license, you must apply your customer license file at runtime.
Warning
Users are not authorized to run MCR on production workloads without a valid license. Refer to Mirantis Agreements and Terms for more information.
To make MCR aware of your license and entitlement, perform the following for each node that will host MCR:
Download the license file.
License files purchased at the Mirantis web store are available using a link in the confirmation email. Otherwise, contact Mirantis Sales and Support to gain access to the file.
Apply the license file.
Platform
Applying the license
Linux distros
Determine the location of the data root directory. This information is available in the
daemon.jsonfile associated with MCR. Alternatively, you can specify the data root directory using the --data-root flag at MCR start up. Note that the default data-root directory is/var/lib/docker.Copy the license file to the data root directory and name it
docker.lic. It is imperative that the license be readable by the account/user that runs the docker daemon.
Windows servers
A license is not currently required for Windows systems, as MCR Windows binaries installed through install.ps1 or MSFT one-get provider are considered to be licensed.
Start MCR (or restart it, if MCR is already running).
Note
MKE, MSR, and Mirantis Container Cloud have implied MCR licenses.
Install MCR on Linux distros
Install Mirantis Container Runtime for CentOS
There are two ways to install and upgrade Mirantis Container Runtime (MCR):
YUM repository: Set up a Docker repository and install Mirantis Container Runtime from it. This is the recommended approach because installation and upgrades are managed with YUM and easier to do.
RPM package: Download the RPM package, install it manually, and manage upgrades manually. This is useful when installing Mirantis Container Runtime on air-gapped systems with no access to the internet.
Prerequisites
Perform all prerequisites as required prior to installing MCR on CentOS.
Architectures and storage drivers
Mirantis Container Runtime supports CentOS 64-bit, latest version, running on
x86_64.
On CentOS, Mirantis Container Runtime supports the overlay2 storage
drivers. The following limitations apply:
If
selinuxis enabled,overlay2is supported on CentOS 7.4 or higher.If
selinuxis disabled,overlay2is supported on CentOS 7.2 or higher with kernel version 3.10.0-693 and higher.
Uninstall old Docker versions
The Mirantis Container Runtime package is called docker-ee. Older
versions were called docker or docker-engine. Uninstall all
older versions and associated dependencies. The contents of
/var/lib/docker/ are preserved, including images, containers,
volumes, and networks.
sudo yum remove docker \
                docker-client \
                docker-client-latest \
                docker-common \
                docker-latest \
                docker-latest-logrotate \
                docker-logrotate \
                docker-selinux \
                docker-engine-selinux \
                docker-engine
Repo install and upgrade
The advantage of using a repository from which to install Mirantis Container Runtime (or any software) is that it provides a certain level of automation. RPM-based distributions such as CentOS, use a tool called YUM that work with your repositories to manage dependencies and provide automatic updates.
Set up the repository
You only need to set up the repository once, after which you can install Mirantis Container Runtime from the repo and repeatedly upgrade as necessary.
Remove existing Docker repositories from
/etc/yum.repos.d/:sudo rm /etc/yum.repos.d/docker*.repo
Temporarily store
https://repos.mirantis.comin an environment variable. This variable assignment does not persist when the session ends:export DOCKERURL="https://repos.mirantis.com"
Store the value of the variable,
DOCKERURL(from the previous step), in ayumvariable in/etc/yum/vars/:sudo -E sh -c 'echo "$DOCKERURL/centos" > /etc/yum/vars/dockerurl'
Store your OS version string in
/etc/yum/vars/dockerosversion:sudo sh -c 'echo "7" > /etc/yum/vars/dockerosversion'
Install the
yum-utilsthat provides the yum-config-manager utility.sudo yum install -y yum-utils
Enable the extras RHEL repository. This ensures access to the
container-selinuxpackage required bydocker-ee.The repository can differ per your architecture and cloud provider , so review the options in this step before running one of the following commands.
For all architectures except IBM Power
sudo yum-config-manager --enable rhel-7-server-extras-rpms
For IBM Power only (little endian)
sudo yum-config-manager --enable extras
sudo subscription-manager repos --enable=rhel-7-for-power-le-extras-rpms
sudo yum makecache fast
sudo yum -y install container-selinux
Depending on cloud provider, you may also need to enable another repository.
For AWS (where
REGIONis a literal, and does not represent the region your machine is running in):sudo yum install -y rh-amazon-rhui-client sudo yum-config-manager --enable rhui-REGION-rhel-server-extras
For Azure
sudo yum-config-manager --enable rhui-rhel-7-server-rhui-extras-rpms
Add the Mirantis Container Runtime stable repository:
sudo -E yum-config-manager \ --add-repo \ "$DOCKERURL/centos/docker-ee.repo"
Install from the repository
Install the latest patch release, or go to the next step to install a specific version:
sudo yum -y install docker-ee docker-ee-cli containerd.io
If prompted to accept the GPG key, verify that the fingerprint matches
77FE DA13 1A83 1D29 A418 D3E8 99E5 FF2E 7668 2BC9, and if so, accept it.To install a specific version of Mirantis Container Runtime (recommended in production), list versions and install:
List and sort the versions available in your repo. This example sorts results by version number, highest to lowest, and is truncated:
sudo yum list docker-ee --showduplicates | sort -r docker-ee.x86_64 19.03.ee.2-1.el7.centos docker-ee-stable-19.03
The list returned depends on which repositories you enabled, and is specific to your version of CentOS (indicated by
.el7in this example).Install a specific version by its fully qualified package name, which is the package name (
docker-ee) plus the version string (2nd column) starting at the first colon (:), up to the first hyphen, separated by a hyphen (-). For example,docker-ee-19.03.8.sudo yum -y install docker-ee-<VERSION_STRING> docker-ee-cli-<VERSION_STRING> containerd.io
For example, if you want to install the 19.03.8 version run the following:
sudo yum -y install docker-ee-19.03.8 docker-ee-cli-19.03.8 containerd.io
Docker is installed but not started. The
dockergroup is created, but no users are added to the group.Start Docker:
sudo systemctl start docker
Verify that Mirantis Container Runtime is installed correctly by running the
hello-worldimage. This command downloads a test image, runs it in a container, prints an informational message, and exits:sudo docker run hello-world
Mirantis Container Runtime is installed and running. Use
sudoto run Docker commands.
Package install and upgrade
To manually install MCR, download the .rpm file for your
release. You need to download a new file each time you want to upgrade MCR.
Install with a package
Go to repos.mirantis.com in your browser.
Navigate to
centos/7/x86_64/stable-<VERSION>/Packagesand download the.rpmfile for the Docker version you want to install.Install MCR.
sudo yum install <path_to_downloaded_centos_package_.rpm>
Docker is installed but not started. The
dockergroup is created, but no users are added to the group.Start Docker
sudo systemctl start docker
Verify that Mirantis Container Runtime is installed correctly by running the
hello-worldimage. This command downloads a test image, runs it in a container, prints an informational message, and exits:sudo docker run hello-world
Mirantis Container Runtime is installed and running. Use
sudoto run Docker commands.
Upgrade with a package
Download the newer package file.
Repeat the installation procedure, using
yum -y upgradeinstead ofyum -y install, and point to the new file.
Enable MCR Telemetry
By default, MCR automatically records and transmits data to Mirantis for monitoring and analysis purposes. The data collected provides the Mirantis Customer Success Organization with information that helps us to better understand the operational use of MCR by our customers. It also provides key feedback in the form of product usage statistics, which enable our product teams to enhance Mirantis products and services.
To disable the telemetry function, set
features.telemetry to false in your /etc/docker/daemon.json file.
Change the setting to true to re-enable telemetry.
{"features":{"telemetry": false}}
Caution
To send the telemetry, verify that dockerd can resolve api.segment.io
and create a TCP (HTTPS) connection on port 443.
Uninstall Mirantis Container Runtime
Uninstall the Mirantis Container Runtime package:
sudo yum -y remove docker-ee
Delete all images, containers, and volumes (because these are not automatically removed from your host):
sudo rm -rf /var/lib/docker
Delete other Docker related resources:
sudo rm -rf /run/docker sudo rm -rf /var/run/docker sudo rm -rf /etc/docker
Delete any edited configuration files manually.
Install Mirantis Container Runtime for Oracle Linux
There are two ways to install and upgrade Mirantis Container Runtime (MCR).
YUM repository: Set up a Docker repository and install Mirantis Container Runtime from it. This is the recommended approach because installation and upgrades are managed with YUM and easier to do.
RPM package: Download the RPM package, install it manually, and manage upgrades manually. This is useful when installing Mirantis Container Runtime on air-gapped systems with no access to the internet.
Prerequisites
Perform all prerequisites as required prior to installing MCR on Oracle Linux.
Architectures and storage drivers
Mirantis Container Runtime supports the following Oracle Linux 64-bit versions:
Mirantis recommends the use of fast storage, such as solid-state media (SSD).
Uninstall old Docker versions
The Mirantis Container Runtime package is called docker-ee. Older
versions were called docker or docker-engine. Uninstall all
older versions and associated dependencies. The contents of
/var/lib/docker/ are preserved, including images, containers,
volumes, and networks.
sudo yum remove docker \
docker-engine \
docker-engine-selinux
Repo install and upgrade
The advantage of using a repository from which to install Mirantis Container Runtime (or any software) is that it provides a certain level of automation. RPM-based distributions such as Oracle Linux, use a tool called YUM that work with your repositories to manage dependencies and provide automatic updates.
Set up the repository
You only need to set up the repository once, after which you can install Mirantis Container Runtime from the repo and repeatedly upgrade as necessary.
Remove existing Docker repositories from
/etc/yum.repos.d/:sudo rm /etc/yum.repos.d/docker*.repo
Temporarily store
https://repos.mirantis.comin an environment variable. This variable assignment does not persist when the session ends:export DOCKERURL="https://repos.mirantis.com"
Store the value of the variable,
DOCKERURL(from the previous step), in ayumvariable in/etc/yum/vars/:sudo -E sh -c 'echo "$DOCKERURL/oraclelinux" > /etc/yum/vars/dockerurl'
Install required packages:
yum-utilsprovides the yum-config-manager utility:sudo yum install -y yum-utils
Enable the
ol7_addonsOracle repository. This ensures access to thecontainer-selinuxpackage required bydocker-ee.sudo yum-config-manager --enable ol7_addons
Add the Mirantis Container Runtime stable repository:
sudo -E yum-config-manager \ --add-repo \ "$DOCKERURL/oraclelinux/docker-ee.repo"
Install from the repository
Install the latest patch release, or go to the next step to install a specific version:
sudo yum -y install docker-ee docker-ee-cli containerd.io
If prompted to accept the GPG key, verify that the fingerprint matches
77FE DA13 1A83 1D29 A418 D3E8 99E5 FF2E 7668 2BC9, and if so, accept it.To install a specific version of Mirantis Container Runtime (recommended in production), list versions and install:
List and sort the versions available in your repo. This example sorts results by version number, highest to lowest, and is truncated:
sudo yum list docker-ee --showduplicates | sort -r docker-ee.x86_64 19.03.ee.2-1.el7.oraclelinux docker-ee-stable-18.09
The list returned depends on which repositories you enabled, and is specific to your version of Oracle Linux (indicated by
.el7in this example).Install a specific version by its fully qualified package name, which is the package name (
docker-ee) plus the version string (2nd column) starting at the first colon (:), up to the first hyphen, separated by a hyphen (-). For example,docker-ee-18.09.1.sudo yum -y install docker-ee-<VERSION_STRING> docker-ee-cli-<VERSION_STRING> containerd.io
For example, if you want to install the 19.03 version run the following:
sudo yum-config-manager --enable docker-ee-stable-19.03
Docker is installed but not started. The
dockergroup is created, but no users are added to the group.Start Docker:
sudo systemctl start docker
Verify that Mirantis Container Runtime is installed correctly by running the
hello-worldimage. This command downloads a test image, runs it in a container, prints an informational message, and exits:sudo docker run hello-world
Mirantis Container Runtime is installed and running. Use
sudoto run Docker commands.
Upgrade from the repository
Add the new repository.
Follow the installation instructions and install a new version.
Package install and upgrade
To manually install MCR, download the .rpm file for your
release. You need to download a new file each time you want to upgrade MCR.
Install with a package
Go to repos.mirantis.com in your browser.
Navigate to
oraclelinux/. Choose your Oracle Linux version, architecture, and Docker version. Download the.rpmfile from thePackagesdirectory.Install MCR.
sudo yum install <path_to_downloaded_oracle_package_.rpm>
Docker is installed but not started. The
dockergroup is created, but no users are added to the group.Start Docker:
sudo systemctl start docker
Verify that Mirantis Container Runtime is installed correctly by running the
hello-worldimage. This command downloads a test image, runs it in a container, prints an informational message, and exits:sudo docker run hello-world
Mirantis Container Runtime is installed and running. Use
sudoto run Docker commands.
Upgrade with a package
Download the newer package file.
Repeat the installation procedure, using
yum -y upgradeinstead ofyum -y install, and point to the new file.
Enable MCR Telemetry
By default, MCR automatically records and transmits data to Mirantis for monitoring and analysis purposes. The data collected provides the Mirantis Customer Success Organization with information that helps us to better understand the operational use of MCR by our customers. It also provides key feedback in the form of product usage statistics, which enable our product teams to enhance Mirantis products and services.
To disable the telemetry function, set
features.telemetry to false in your /etc/docker/daemon.json file.
Change the setting to true to re-enable telemetry.
{"features":{"telemetry": false}}
Caution
To send the telemetry, verify that dockerd can resolve api.segment.io
and create a TCP (HTTPS) connection on port 443.
Uninstall Mirantis Container Runtime
Uninstall the Mirantis Container Runtime package:
sudo yum -y remove docker-ee
Delete all images, containers, and volumes (because these are not automatically removed from your host):
sudo rm -rf /var/lib/docker
Delete other Docker related resources:
sudo rm -rf /run/docker sudo rm -rf /var/run/docker sudo rm -rf /etc/docker``
You must delete any edited configuration files manually.
Install Mirantis Container Runtime for Red Hat Enterprise Linux
There are two ways to install and upgrade Mirantis Container Runtime (MCR).
YUM repository: Set up a Docker repository and install Mirantis Container Runtime from it. This is the recommended approach because installation and upgrades are managed with YUM and easier to do.
RPM package: Download the RPM package, install it manually, and manage upgrades manually. This is useful when installing Mirantis Container Runtime on air-gapped systems with no access to the internet.
Prerequisites
Perform all prerequisites as required prior to installing MCR on Red Hat Enterprise Linux.
Architectures and storage drivers
Mirantis Container Runtime supports Red Hat Enterprise Linux 64-bit, versions
7.4 and higher running on x86_64. See the compatibility-matrix
for specific details.
On Red Hat Enterprise Linux, Mirantis Container Runtime supports the
overlay2 storage driver. The following limitations apply:
OverlayFS: If
selinuxis enabled, theoverlay2storage driver is supported on RHEL 7.4 or higher.If
selinuxis disabled,overlay2is supported on RHEL 7.2 or higher with kernel version 3.10.0-693 and higher.
FIPS 140-2 cryptographic module support
Federal Information Processing Standards (FIPS) Publication 140-2 is a United States Federal security requirement for cryptographic modules.
With Mirantis Container Runtime license for versions 18.03 and later, Docker provides FIPS 140-2 support in RHEL 7.3, 7.4 and 7.5. This includes a FIPS supported cryptographic module. If the RHEL implementation already has FIPS support enabled, FIPS is also automatically enabled in MCR. If FIPS support is not already enabled in your RHEL implementation, see the Red Hat Product Documentation for instructions on how to enable it.
To verify the FIPS 140-2 module is enabled in the Linux kernel, confirm
the file /proc/sys/crypto/fips_enabled contains 1.
cat /proc/sys/crypto/fips_enabled
1
Note
FIPS is only supported in Mirantis Container Runtime. MKE and MSR currently do not have support for FIPS 140-2.
You can override FIPS 140-2 compliance on a system that is not in FIPS 140-2 mode. Note, this does not change FIPS 140-2 mode on the system. To override the FIPS 140-2 mode, follow ths steps below.
Create a file called
/etc/systemd/system/docker.service.d/fips-module.conf. Add the
following:
[Service]
Environment="DOCKER_FIPS=1"
Reload the Docker configuration to systemd.
sudo systemctl daemon-reload
Restart the Docker service as root.
sudo systemctl restart docker
To confirm Docker is running with FIPS 140-2 enabled, run the
docker info command.
Disabling FIPS 140-2
If the system has the FIPS 140-2 cryptographic module installed on the operating system, it is possible to disable FIPS 140-2 compliance.
To disable FIPS 140-2 in Docker but not the operating system, set the
value DOCKER_FIPS=0 in the
/etc/systemd/system/docker.service.d/fips-module.conf.
Reload the Docker configuration to systemd.
sudo systemctl daemon-reload
Restart the Docker service as root.
sudo systemctl restart docker
Uninstall old Docker versions
The Mirantis Container Runtime package is called docker-ee. Older
versions were called docker or docker-engine. Uninstall all
older versions and associated dependencies. The contents of
/var/lib/docker/ are preserved, including images, containers,
volumes, and networks.
sudo yum remove docker \
docker-client \
docker-client-latest \
docker-common \
docker-latest \
docker-latest-logrotate \
docker-logrotate \
docker-selinux \
docker-engine-selinux \
docker-engine
Repo install and upgrade
The advantage of using a repository from which to install Mirantis Container Runtime (or any software) is that it provides a certain level of automation. RPM-based distributions such as Red Hat Enterprise Linux, use a tool called YUM that work with your repositories to manage dependencies and provide automatic updates.
Set up the repository
You only need to set up the repository once, after which you can install Mirantis Container Runtime from the repo and repeatedly upgrade as necessary.
Remove existing Docker repositories from
/etc/yum.repos.d/:sudo rm /etc/yum.repos.d/docker*.repo
Temporarily store
https://repos.mirantis.comin an environment variable. This variable assignment does not persist when the session ends:export DOCKERURL="https://repos.mirantis.com"
Store the value of the variable,
DOCKERURL(from the previous step), in ayumvariable in/etc/yum/vars/:sudo -E sh -c 'echo "$DOCKERURL/rhel" > /etc/yum/vars/dockerurl'
Also, store your OS version string in
/etc/yum/vars/dockerosversion. Most users should use7or8, but you can also use the more specific minor version, starting from7.2.sudo sh -c 'echo "7" > /etc/yum/vars/dockerosversion'
Install the
yum-utilsthat provides the yum-config-manager utility.sudo yum install -y yum-utils
Enable the
extrasRHEL repository. This ensures access to thecontainer-selinuxpackage required bydocker-ee.The repository can differ per your architecture and cloud provider, so review the options in this step before running:
For all architectures except IBM Power:
sudo yum-config-manager --enable rhel-7-server-extras-rpms
For IBM Power only (little endian):
sudo yum-config-manager --enable extras sudo subscription-manager repos --enable=rhel-7-for-power-le-extras-rpms sudo yum makecache fast sudo yum -y install container-selinux
Depending on cloud provider, you may also need to enable another repository:
For AWS (where
REGIONis a literal, and does not represent the region your machine is running in):sudo yum install -y rh-amazon-rhui-client sudo yum-config-manager --enable rhui-REGION-rhel-server-extras
For Azure:
sudo yum-config-manager --enable rhui-rhel-7-server-rhui-extras-rpms
Add the Mirantis Container Runtime stable repository:
sudo -E yum-config-manager \ --add-repo \ "$DOCKERURL/rhel/docker-ee.repo"
Remove existing Docker repositories from
/etc/yum.repos.d/:sudo rm /etc/yum.repos.d/docker*.repo
Temporarily store
https://repos.mirantis.comin an environment variable. This variable assignment does not persist when the session ends:export DOCKERURL="https://repos.mirantis.com"
Store the value of the variable,
DOCKERURL(from the previous step), in ayumvariable in/etc/yum/vars/:sudo -E sh -c 'echo "$DOCKERURL/rhel" > /etc/yum/vars/dockerurl'
Also, store your OS version string in
/etc/yum/vars/dockerosversion. Most users should use8, but you can also use the more specific minor version.sudo sh -c 'echo "8" > /etc/yum/vars/dockerosversion'
Install the
yum-utilsthat provides the yum-config-manager utility:sudo yum install -y yum-utils
Add the Mirantis Container Runtime stable repository:
sudo -E yum-config-manager \ --add-repo \ "$DOCKERURL/rhel/docker-ee.repo"
Install from the repository
Install the latest patch release, or go to the next step to install a specific version:
sudo yum -y install docker-ee docker-ee-cli containerd.io
If prompted to accept the GPG key, verify that the fingerprint matches
77FE DA13 1A83 1D29 A418 D3E8 99E5 FF2E 7668 2BC9, and if so, accept it.To install a specific version of Mirantis Container Runtime (recommended in production), list versions and install:
List and sort the versions available in your repo. This example sorts results by version number, highest to lowest, and is truncated:
sudo yum list docker-ee --showduplicates | sort -r docker-ee.x86_64 19.03.ee.2-1.el7.rhel docker-ee-stable-18.09
The list returned depends on which repositories you enabled, and is specific to your version of Red Hat Enterprise Linux (indicated by
.el7in this example).Install a specific version by its fully qualified package name, which is the package name (
docker-ee) plus the version string (2nd column) starting at the first colon (:), up to the first hyphen, separated by a hyphen (-). For example,docker-ee-18.09.1.sudo yum -y install docker-ee-<VERSION_STRING> docker-ee-cli-<VERSION_STRING> containerd.io
For example, if you want to install the 19.03 version run the following:
sudo yum -y install docker-ee-19.03.8 docker-ee-cli-19.03.8 containerd.io
Docker is installed but not started. The
dockergroup is created, but no users are added to the group.Start Docker:
sudo systemctl start docker
Verify that Mirantis Container Runtime is installed correctly by running the
hello-worldimage. This command downloads a test image, runs it in a container, prints an informational message, and exits:sudo docker run hello-world
Mirantis Container Runtime is installed and running. Use sudo to run Docker
commands.
Upgrade from the repository
Add the new repository.
Follow the installation instructions and install a new version.
Package install and upgrade
To manually install Mirantis Container Runtime, download the .rpm file for
your release. You need to download a new file each time you want to upgrade.
Install with a package
Enable the extras RHEL repository. This ensures access to the
container-selinuxpackage which is required bydocker-ee:sudo yum-config-manager --enable rhel-7-server-extras-rpms
Alternately, obtain that package manually from Red Hat. There is no way to publicly browse this repository.
Go to repos.mirantis.com in your browser. Navigate to
rhel/. Choose your Red Hat Enterprise Linux version, architecture, and Docker version. Download the.rpmfile from thePackagesdirectory.If you have trouble with
selinuxusing the packages under the 7 directory, try choosing the version-specific directory instead, such as 7.3.Install MCR, changing the path below to the path where you downloaded the Docker package.
sudo yum install <path_to_downloaded_rhel_package_.rpm>
Docker is installed but not started. The docker group is created, but no users are added to the group.
Start Docker:
sudo systemctl start docker
Verify that Mirantis Container Runtime is installed correctly by running the hello-world image. This command downloads a test image, runs it in a container, prints an informational message, and exits:
sudo docker run hello-world
Mirantis Container Runtime is now installed and running. Make sure to use sudo to run Docker commands (refer to the Docker documentation for Linux postinstall for information on how to allow non-privileged users to run Docker commands.
Go to repos.mirantis.com in your browser. Navigate to
rhel/. Choose your Red Hat Enterprise Linux version, architecture, and Docker version. Download the.rpmfile from the Packages directory.If you have trouble with selinux using the packages under the 8 directory, try choosing the version-specific directory instead.
Install Mirantis Container Runtime, changing the path below to the path where you downloaded the Docker package.
sudo yum install <path_to_downloaded_rhel_package_.rpm>
Docker is installed but not started. The docker group is created, but no users are added to the group.
Start Docker:
sudo systemctl start docker
Verify that Mirantis Container Runtime is installed correctly by running the hello-world image. This command downloads a test image, runs it in a container, prints an informational message, and exits:
sudo docker run hello-world
Mirantis Container Runtime is now installed and running. Make sure to use sudo to run Docker commands (refer to the Docker documentation for Linux postinstall for information on how to allow non-privileged users to run Docker commands.
Upgrade with a package
Download the newer package file.
Repeat the installation procedure, using ``yum -y upgrade` instead of
yum -y install, and point to the new file.
Enable MCR Telemetry
By default, MCR automatically records and transmits data to Mirantis for monitoring and analysis purposes. The data collected provides the Mirantis Customer Success Organization with information that helps us to better understand the operational use of MCR by our customers. It also provides key feedback in the form of product usage statistics, which enable our product teams to enhance Mirantis products and services.
To disable the telemetry function, set
features.telemetry to false in your /etc/docker/daemon.json file.
Change the setting to true to re-enable telemetry.
{"features":{"telemetry": false}}
Caution
To send the telemetry, verify that dockerd can resolve api.segment.io
and create a TCP (HTTPS) connection on port 443.
Uninstall Mirantis Container Runtime
Uninstall the Mirantis Container Runtime package:
sudo yum -y remove docker-ee
Delete all images, containers, and volumes (because these are not automatically removed from your host):
sudo rm -rf /var/lib/docker
Delete other Docker related resources:
sudo rm -rf /run/docker sudo rm -rf /var/run/docker sudo rm -rf /etc/docker
You must delete any edited configuration files manually.
Install Mirantis Container Runtime for SLES
Prerequisites
Perform all prerequisites as required prior to installing MCR on SLES.
OS requirements
To install Mirantis Container Runtime, you need the 64-bit version of SLES
12.x, running on the x86_64 architecture. Mirantis Container Runtime is not
supported on OpenSUSE.
The only supported storage driver for Mirantis Container Runtime on SLES
is Btrfs, which is used by default if the underlying filesystem
hosting /var/lib/docker/ is a BTRFS filesystem.
Note
IBM Z (s390x) is supported for Mirantis Container Runtime 17.06.xx only.
Firewall configuration
Docker creates a DOCKER iptables chain when it starts. The SUSE
firewall may block access to this chain, which can prevent you from
running containers with published ports. You may see errors such as the
following:
WARNING: IPv4 forwarding is disabled. Networking will not work.
docker: Error response from daemon: driver failed programming external
connectivity on endpoint adoring_ptolemy
(0bb5fa80bc476f8a0d343973929bb3b7c039fc6d7cd30817e837bc2a511fce97):
(iptables failed: iptables --wait -t nat -A DOCKER -p tcp -d 0/0 --dport 80 -j DNAT --to-destination 172.17.0.2:80 ! -i docker0: iptables: No chain/target/match by that name.
(exit status 1)).
If you see errors like this, adjust the start-up script order so that the firewall is started before Docker, and Docker stops before the firewall stops. See the SLES documentation on init script order.
Uninstall old versions
Older versions of Docker were called docker or docker-engine. If
you use OS images from a cloud provider, you may need to remove the
runc package, which conflicts with Docker. If these are installed,
uninstall them, along with associated dependencies.
sudo zypper rm docker docker-engine runc
If removal of the docker-engine package fails, use the following
command instead:
sudo rpm -e docker-engine
It’s OK if zypper reports that none of these packages are installed.
The contents of /var/lib/docker/, including images, containers,
volumes, and networks, are preserved. The Mirantis Container Runtime
package is now called docker-ee.
Configure the Btrfs filesystem
By default, SLES formats the / filesystem using Btrfs, so most
people do not not need to do the steps in this section. If you use OS
images from a cloud provider, you may need to do this step. If the
filesystem that hosts /var/lib/docker/ is not a BTRFS
filesystem, you must configure a BTRFS filesystem and mount it on
/var/lib/docker/.
Check whether
/(or/var/or/var/lib/or/var/lib/docker/if they are separate mount points) are formatted using Btrfs. If you do not have separate mount points for any of these, a duplicate result for/is returned.df -T / /var /var/lib /var/lib/docker
You need to complete the rest of these steps only if one of the following is true:
You have a separate
/var/filesystem that is not formatted with BtrfsYou do not have a separate
/var/or/var/lib/or/var/lib/docker/filesystem and/is not formatted with Btrfs
If
/var/lib/dockeris already a separate mount point and is not formatted with Btrfs, back up its contents so that you can restore them after step 3.Format your dedicated block device or devices as a Btrfs filesystem. This example assumes that you are using two block devices called
/dev/xvdfand/dev/xvdg. Make sure you are using the right device names.Important
Double-check the block device names because this is a destructive operation.
sudo mkfs.btrfs -f /dev/xvdf /dev/xvdg
There are many more options for Btrfs, including striping and RAID. See the Btrfs documentation.
Mount the new Btrfs filesystem on the
/var/lib/docker/mount point. You can specify any of the block devices used to create the Btrfs filesystem.sudo mount -t btrfs /dev/xvdf /var/lib/docker
Don’t forget to make the change permanent across reboots by adding an entry to
/etc/fstab.If
/var/lib/dockerpreviously existed and you backed up its contents during step 1, restore them onto/var/lib/docker.
Install Mirantis Container Runtime
You can install Mirantis Container Runtime in different ways, depending on your needs.
Most users set up Docker’s repositories and install from them, for ease of installation and upgrade tasks. This is the recommended approach.
Some users download the RPM package and install it manually and manage upgrades completely manually. This is useful in situations such as installing Docker on air-gapped systems with no access to the internet.
Install using the repository
Before you install Mirantis Container Runtime for the first time on a new host machine, you need to set up the Docker repository. Afterward, you can install and update Docker from the repository.
Set up the repository
Temporarily add the
$DOCKER_EE_BASE_URLand$DOCKER_EE_URLvariables into your environment. This only persists until you log out of the session.DOCKER_EE_BASE_URL="https://repos.mirantis.com" DOCKER_EE_URL="${DOCKER_EE_BASE_URL}/sles/<SLES_VERSION>/<ARCH>/stable-<DOCKER_VERSION>"
And substitute the following:
SLES_VERSIONis15or12.3.ARCHisx86_64.DOCKER_VERSIONis19.03or one of the older releases (18.09,18.03,17.06etc.)
As an example, your command should look like:
DOCKER_EE_BASE_URL="https://storebits.docker.com/ee/sles/sub-555-55-555" DOCKER_EE_URL="${DOCKER_EE_BASE_URL}/sles/15/x86_64/stable-19.03"
Use the following command to set up the stable repository. Use the command as-is. It works because of the variable you set in the previous step.
sudo zypper addrepo $DOCKER_EE_URL docker-ee-stable
Import the GPG key from the repository.
sudo rpm --import "${DOCKER_EE_BASE_URL}/sles/gpg"
Install Mirantis Container Runtime
Update the
zypperpackage index.sudo zypper refresh
If this is the first time you have refreshed the package index since adding the Docker repositories, you are prompted to accept the GPG key, and the key’s fingerprint is shown. Verify that the fingerprint matches
77FE DA13 1A83 1D29 A418 D3E8 99E5 FF2E 7668 2BC9and if so, accept the key.Install the latest version of Mirantis Container Runtime and containerd, or go to the next step to install a specific version.
sudo zypper install docker-ee docker-ee-cli containerd.io
Start Docker.
sudo service docker start
On production systems, you should install a specific version of Mirantis Container Runtime instead of always using the latest. List the available versions. The following example only lists binary packages and is truncated. To also list source packages, omit the
-t packageflag from the command.zypper search -s --match-exact -t package docker-ee
The contents of the list depend upon which repositories you have enabled. Choose a specific version to install. The third column is the version string. The fifth column is the repository name, which indicates which repository the package is from and by extension its stability level. To install a specific version, append the version string to the package name and separate them by a hyphen (
-):sudo zypper install docker-ee-<VERSION_STRING> docker-ee-cli-<VERSION_STRING> containerd.io
Docker is installed but not started. The
dockergroup is created, but no users are added to the group.Configure Docker to use the Btrfs filesystem. This is only required if the ``/`` filesystem is not using BTRFS. However, explicitly specifying the
storage-driverhas no harmful side effects.Edit the file
/etc/docker/daemon.json(create it if it does not exist) and add the following contents:{ "storage-driver": "btrfs" }
Save and close the file.
Start Docker.
sudo service docker start
Verify that Docker is installed correctly by running the
hello-worldimage.sudo docker run hello-world
This command downloads a test image and runs it in a container. When the container runs, it prints an informational message and exits.
Mirantis Container Runtime is installed and running. You need to use
sudo to run Docker commands.
Upgrade Mirantis Container Runtime
To upgrade Mirantis Container Runtime, follow the steps below:
If upgrading to a new major Mirantis Container Runtime version (such as when going from Docker 18.03.x to Docker 18.09.x), add the new repository.
Run
sudo zypper refresh.Follow the installation instructions, choosing the new version you want to install.
Install from a package
If you cannot use the official Docker repository to install Mirantis Container
Runtime, you can download the .rpm file for your release and install it
manually. You need to download a new file each time you want to upgrade Docker.
Go to repos.mirantis.com in your browser.
Go to
sles/12.3/choose the directory corresponding to your architecture and desired Mirantis Container Runtime version. Download the.rpmfile from thePackagesdirectory.Import Docker’s official GPG key.
sudo rpm --import https://repos.mirantis.com/sles/gpg
Install Docker, changing the path below to the path where you downloaded the Docker package.
sudo zypper install <path_to_downloaded_sles_package_.rpm>
Docker is installed but not started. The
dockergroup is created, but no users are added to the group.Configure Docker to use the Btrfs filesystem. This is only required if the ``/`` filesystem is not using Btrfs. However, explicitly specifying the
storage-driverhas no harmful side effects.Edit the file
/etc/docker/daemon.json(create it if it does not exist) and add the following contents:{ "storage-driver": "btrfs" }
Save and close the file.
Start Docker.
sudo service docker start
Verify that Docker is installed correctly by running the
hello-worldimage.sudo docker run hello-world
This command downloads a test image and runs it in a container. When the container runs, it prints an informational message and exits.
Mirantis Container Runtime is installed and running. You need to use
sudo to run Docker commands.
Upgrade Mirantis Container Runtime
To upgrade Mirantis Container Runtime, download the newer package file
and repeat the installation procedure,
using zypper update instead of zypper install, and pointing to
the new file.
Enable MCR Telemetry
By default, MCR automatically records and transmits data to Mirantis for monitoring and analysis purposes. The data collected provides the Mirantis Customer Success Organization with information that helps us to better understand the operational use of MCR by our customers. It also provides key feedback in the form of product usage statistics, which enable our product teams to enhance Mirantis products and services.
To disable the telemetry function, set
features.telemetry to false in your /etc/docker/daemon.json file.
Change the setting to true to re-enable telemetry.
{"features":{"telemetry": false}}
Caution
To send the telemetry, verify that dockerd can resolve api.segment.io
and create a TCP (HTTPS) connection on port 443.
Uninstall Mirantis Container Runtime
Uninstall the Mirantis Container Runtime package using the command below.
sudo zypper rm docker-ee
Images, containers, volumes, or customized configuration files on your host are not automatically removed. To delete all images, containers, and volumes.
sudo rm -rf /var/lib/docker/*
If you used a separate BTRFS filesystem to host the contents of
/var/lib/docker/, you can unmount and format the Btrfs filesystem.
You must delete any edited configuration files manually.
Install Mirantis Container Runtime for Ubuntu
Prerequisites
Perform all prerequisites as required prior to installing MCR on Ubuntu.
Uninstall old versions
Use the apt-get remove command to uninstall Docker Community versions, if present.
sudo apt-get remove docker docker-engine docker-ce docker-ce-cli docker.io
The apt-get command may report that none of the packages are installed.
Note
The contents of /var/lib/docker/, including images, containers,
volumes, and networks, are preserved.
Extra steps for aufs
For Ubuntu 16.04 and higher, the Linux kernel includes support for overlay2, and Mirantis Container Runtime uses it as the default storage driver. If you need to use aufs instead, it must be manually configured.
Install Mirantis Container Runtime
Mirantis Container Runtime can be installed either by using Mirantis repositories, or by downloading and installing the DEB package and thereafter manually managing all upgrades. The Mirantis repository method is recommended, for the ease it lends in terms of both installation and upgrade tasks. The more manual DEB package approach, however, is useful in certain situations, such as installing MCR on air-gapped system that have no access to the Internet.
Continue from this point if you are using Mirantis repositories on Ubuntu, or to install from a Debian package go to Install from a Debian package.
Install using the repository
To install Mirantis Container Runtime on a new host machine using the Mirantis repository you must first set the repository up on the machine.
Set up the repository
Update the
aptpackage index.sudo apt-get update
Install packages to allow
aptto use a repository over HTTPS.sudo apt-get install \ apt-transport-https \ ca-certificates \ curl \ software-properties-common
Temporarily store
https://repos.mirantis.comin an environment variable. This variable assignment does not persist when the session ends:DOCKER_EE_URL="https://repos.mirantis.com"
Temporarily add a
$DOCKER_EE_VERSIONvariable into your environment.DOCKER_EE_VERSION=19.03
Add Docker’s official GPG key using your customer Mirantis Container Runtime repository URL.
curl -fsSL "${DOCKER_EE_URL}/ubuntu/gpg" | sudo apt-key add -
Verify that you now have the key with the fingerprint
DD91 1E99 5A64 A202 E859 07D6 BC14 F10B 6D08 5F96, by searching for the last eight characters of the fingerprint. Use the command as-is. It works because of the variable you set earlier.sudo apt-key fingerprint 6D085F96 pub 4096R/0EBFCD88 2017-02-22 Key fingerprint = DD91 1E99 5A64 A202 E859 07D6 BC14 F10B 6D08 5F96 uid Docker Release (EE deb) <docker@docker.com> sub 4096R/6D085F96 2017-02-22
Set up the stable repository, using the following command as-is (which works due to the variable set up earlier in the process).
sudo add-apt-repository \ "deb [arch=$(dpkg --print-architecture)] $DOCKER_EE_URL/ubuntu \ $(lsb_release -cs) \ stable-$DOCKER_EE_VERSION"
Note
The included lsb_release -cs sub command returns the name of your Ubuntu distribution, for example,
focal.
Install Mirantis Container Runtime
Update the
aptpackage index.sudo apt-get update
Install the latest version of Mirantis Container Runtime and containerd, or go to the next step to install a specific version. Any existing installation of MCR is replaced.
sudo apt-get install docker-ee docker-ee-cli containerd.io
Warning
If you have multiple Mirantis repositories enabled, installing or updating without specifying a version in the
apt-get installor apt-get update command always installs the highest possible version, which may not be appropriate for your stability needs.On production systems, you should install a specific version of Mirantis Container Runtime instead of always using the latest. The following output is truncated.
apt-cache madison docker-ee docker-ee | *:19.03~ee-0~ubuntu-focal | https://repos.mirantis.com/ubuntu focal/stable amd64 Packages
The contents of the list depend upon which repositories are enabled, and are specific to your version of Ubuntu (indicated by the
focalsuffix on the version, in this example). Choose a specific version to install. The second column is the version string. The third column is the repository name, which indicates which repository the package is from and by extension its stability level. To install a specific version, append the version string to the package name and separate them by an equals sign (=).sudo apt-get install docker-ee=<VERSION_STRING> docker-ee-cli=<VERSION_STRING> containerd.io
The MCR daemon starts automatically.
Verify that MCR is installed correctly by running the
hello-worldimage.sudo docker run hello-world
This command downloads a test image and runs it in a container. When the container runs, it prints an informational message and exits.
Mirantis Container Runtime is installed and running. The docker
group is created but no users are added to it. You need to use sudo
to run MCR commands.
Upgrade Mirantis Container Runtime
If upgrading to a new major Mirantis Container Runtime version (such as when going from version 18.09 to 19.03), add the new repository.
Run
sudo apt-get update.Follow the installation instructions, choosing the new version you want to install.
Install from a Debian package
If you cannot use the Mirantis repository to install Mirantis Container
Runtime, you can download the .deb files for your release and install them
manually. You need to download a new file or set of files each time you want to
upgrade Mirantis Container Runtime.
Go to repos.mirantis.com in your browser.
Go to
/ubuntu/dists/bionic/pool/stable-<VERSION>/amd64/and download the.debfile for the Ubuntu release and architecture you want to install.Note
Starting with 19.03, you have to download three
.debfiles. They aredocker-ee-cli_<version>.deb,containerd.io_<version>.deb, anddocker-ee_<version>.deb.Install MCR, changing the path below to the path where you downloaded the Mirantis Container Runtime package.
sudo dpkg -i <path_to_downloaded_ubuntu_package_.deb>
Or, if you downloaded the three
.debfiles, you must install them in the following order:sudo dpkg -i /path/to/docker-ee-cli_<version>.deb sudo dpkg -i /path/to/containerd.io_<version>.deb sudo dpkg -i /path/to/docker-ee_<version>.deb
The MCR daemon starts automatically.
Verify that MCR is installed correctly by running the
hello-worldimage.sudo docker run hello-world
This command downloads a test image and runs it in a container. When the container runs, it prints an informational message and exits.
Mirantis Container Runtime is installed and running. The docker group is
created but no users are added to it. You need to use sudo to run MCR
commands.
Upgrade Mirantis Container Runtime
To upgrade Mirantis Container Runtime, download the newer package file and repeat the installation procedure, pointing to the new file.
Enable MCR Telemetry
By default, MCR automatically records and transmits data to Mirantis for monitoring and analysis purposes. The data collected provides the Mirantis Customer Success Organization with information that helps us to better understand the operational use of MCR by our customers. It also provides key feedback in the form of product usage statistics, which enable our product teams to enhance Mirantis products and services.
To disable the telemetry function, set
features.telemetry to false in your /etc/docker/daemon.json file.
Change the setting to true to re-enable telemetry.
{"features":{"telemetry": false}}
Caution
To send the telemetry, verify that dockerd can resolve api.segment.io
and create a TCP (HTTPS) connection on port 443.
Uninstall Mirantis Container Runtime
Uninstall the Mirantis Container Runtime package.
sudo apt-get purge docker-ee docker-ee-cli containerd.io
Images, containers, volumes, or customized configuration files on your host are not automatically removed. Run the following command to delete all images, containers, and volumes.
sudo rm -rf /var/lib/docker
You must delete any edited configuration files manually.
Install MCR on Windows Servers
Mirantis Container Runtime (MCR) enables native Docker containers on Windows Server. The Mirantis Container Runtime installation package includes everything you need to run Docker on Windows Server. This topic describes pre-install considerations, and how to download and install Mirantis Container Runtime.
Note
Refer to the MCR 19.03 Compatibility Matrix for information on which Windows Server versions are supported.
System requirements
Windows OS CPU and RAM requirements that must be met are specified in the Windows Server Requirements.
Install MCR with an Internet connection
Mirantis provides a helper script to ease MCR installation on a Windows Server machine. The script uses default values, thus allowing it to be run without configuration. You can, however, override the default values with script parameters and env variables. Parameter values take precedence over env variables. Both take precedence over inbuilt default values.
The helper script needs to be executed from an elevated command prompt. If you want to change the default daemon values, make sure to have the alternative cofigurations and the related collateral in-place prior to executing the script. For example, if you want to enable TLS, store the certificates and write the daemon configuration file before invoking the script.
Download the
install.ps1file.Invoke-WebRequest -Uri https://get.mirantis.com/install.ps1 -o install.ps1
(Optional): Allow downloaded script files to run in the current session
Set-ExecutionPolicy -ExecutionPolicy RemoteSigned -Force -Scope Process;
Run the install script.
.\install.ps1
The installer will issue a prompt, should it require a reboot.
Test your MCR installation by running the
hello-worldcontainer.docker run hello-world:nanoserver
The container starts, prints the
Hello from Docker!message, and then exits.Unable to find image 'hello-world:nanoserver' locally nanoserver: Pulling from library/hello-world bce2fbc256ea: Pull complete 3ac17e2e6106: Pull complete 8cac44e17f16: Pull complete 5e160e4d8db3: Pull complete Digest: sha256:25eac12ba40f7591969085ab3fb9772e8a4307553c14ea72d0e6f98b2c8ced9d Status: Downloaded newer image for hello-world:nanoserver Hello from Docker! This message shows that your installation appears to be working correctly.
FIPS 140-2 cryptographic module support
Federal Information Processing Standards (FIPS) Publication 140-2 is a United States Federal security requirement for cryptographic modules.
MCR provides FIPS 140-2 support in Windows Server, which includes a FIPS supported cryptographic module. If the Windows implementation already has FIPS support enabled, FIPS is automatically enabled in MCR.
Note
FIPS 140-2 is only supported in MCR. MKE and MSR currently do not support FIPS 140-2.
To enable FIPS 140-2 compliance on a system that is not in FIPS 140-2 mode, run the following command in PowerShell:
[System.Environment]::SetEnvironmentVariable("DOCKER_FIPS", "1", "Machine")
You can also enable FIPS 140-2 mode using the Windows Registry. To update the pertinent registry key, execute the following PowerShell command as an Administrator:
Set-ItemProperty -Path "HKLM:\System\CurrentControlSet\Control\Lsa\FipsAlgorithmPolicy\" -Name "Enabled" -Value "1"
Restart the Docker service.
Stop-Service docker
Start-Service docker
To confirm Docker is running with FIPS-140-2 enabled, run the docker info.
Labels:
com.docker.security.fips=enabled
Note
FIPS-140-2 compliance can be disabled if the FIPS-140-2 cryptographic
module is installed on the operating system. To disable FIPS-140-2 in
Docker but not the operating system, set the value "DOCKER_FIPS","0" in
[System.Environment].\
Install MCR offline
If your hardware is air-gapped you can still install MCR. To do so, download the installer and copy the files to the air-gapped machine (the default installation assumes that the zipped files and script are in the same location).
On any Internet connected Powershell terminal: download the
install.ps1file and run it to download the installer .zip filesInvoke-WebRequest -Uri https://get.mirantis.com/install.ps1 -o install.ps1
(Optional): Allow the downloaded script files to run in the current session.
Set-ExecutionPolicy -ExecutionPolicy RemoteSigned -Force -Scope Process;
Run the
install.ps1with theDownloadOnlyparameter. As per the parameter name, this action only downloads the zip file (no installation is performed)..\install.ps1 -DownloadOnly
Copy the
install.ps1file and the installation zip file over to the air-gapped machine and run the install with the -Offline parameter..\install.ps1 -Offline
If prompted, reboot the installer..
Install a specific version
To install a specific version, you can use the following three parameters separately or in tandem:
.\install.ps1 -Channel
.\install.ps1 -ContainerdVersion
.\install.ps1 -DockerVersion
For example, .\install.ps1 will always use the latest GA.
For parameter descriptions, refer to Install script usage.
Update MCR
To update MCR to the most recent release, download the latest copy of the
install.ps1 script and rerun the installation steps.
Download the
install.ps1file.Invoke-WebRequest -Uri https://get.mirantis.com/install.ps1 -o install.ps1
(Optional): Allow downloaded script files to run in the current session.
Set-ExecutionPolicy -ExecutionPolicy RemoteSigned -Force -Scope Process
Run the install script.
.\install.ps1
Install script usage
The installation script uses the parameters detailed below.
Parameter |
Description |
|---|---|
.PARAMETER DownloadUrl |
[Alternately specified by $Env:DOWNLOAD_URL] Specifies an alternative repository in which to download container runtime packages. |
.PARAMETER Channel |
[Alternately specified by $Env:CHANNEL]
Specifies which channel to use for picking the binaries (examples
include |
.PARAMETER DockerVersion |
[Alternately specified by $Env:DOCKER_VERSION] Specifies the version number for the DockerEE binaries to install. The latest version is the default. |
.PARAMETER ContainerdVersion |
[Alternately specified by $Env:CONTAINERD_VERSION] Specifies the version number for the containerd binaries to install The latest version is the default. |
.PARAMETER DryRun |
If specified, list different steps to use without actually invoking those steps. |
.PARAMETER Uninstall |
If specified, uninstalls all packages. This includes
unregistering the corresponding services and removing paths
for the package from the registry.
All other script parameters (except |
.PARAMETER Ver |
Print version info for the script and exit. |
.PARAMETER NoServiceStarts |
If specified, services are not started on successful install. By default, all services installed by the script are left in a running state before exit. |
.PARAMETER DestPath |
Path to the directory under which binaries will be installed. Default: %PROGRAMDATA% |
.PARAMETER OfflinePackagesPath |
The folder for airgap/offline scenarios. For use when the
offline or |
.PARAMETER Offline |
Install packages in offline/airgap mode. By default the
current directory is used to locate previously
downloaded packages, a setting that can be overridden by using
the |
.PARAMETER DownloadOnly |
Download and save packages for later offline/airgap install. |
.PARAMETER EngineOnly |
Skip all steps except those related to MCR. |
Install script notes
In scenarios where you have existing software installed that has its own copies of OpenSSL libraries, you may encounter the following error:
OpenSSL error: error:0F06D065:common libcrypto routines:FIPS_mode_set:fips mode not supported
This is often arises if you have ming/mingw64 as a part of your PATH env variable. As a workaround, ensure that the offending software is not on the PATH and run the script again.
The script supports airgap functionality by providing access to download packages while online, as well as to install those selfsame packages while offline.
For downloads, please ensure that the script has access to the internet. Use the
-DownloadOnlyparameter. By default the script will use the current directory to store the packages after download, a setting that can be changed by specifying the path explicitly with the-OfflinePackagesPathparameter.For offline/airgap install, please use the
-Offlineparameter. By default the script searches for pacakages in the current directory, a setting that can be changed by specifying the-OfflinePackagesPathparameter.While downloading using
-DownloadOnlyparameter, confirm that the download path is accessible to the script, especially if you run the script without administrative rights.
The following is required so that the script can be invoked with named
parameters (for example, -ContainerdVersion 1.3.4...). If a parameter is
used, its type is checked by powershell - we give a higher precedence to the
parameters specified in this manner versus the same value specified by env
vars.
Parameters received at invocation time. Some of these values are merged with values specified by env vars - see reconcileParams. Others are used as-is.
Enable MCR Telemetry
By default, MCR automatically records and transmits data to Mirantis for monitoring and analysis purposes. The data collected provides the Mirantis Customer Success Organization with information that helps us to better understand the operational use of MCR by our customers. It also provides key feedback in the form of product usage statistics, which enable our product teams to enhance Mirantis products and services.
To disable the telemetry function, set
features.telemetry to false in your /etc/docker/daemon.json file.
Change the setting to true to re-enable telemetry.
{"features":{"telemetry": false}}
Caution
To send the telemetry, verify that dockerd can resolve api.segment.io
and create a TCP (HTTPS) connection on port 443.
Uninstall MCR
Use the following commands to remove MCR from a Windows Server.
Leave any active Docker Swarms.
docker swarm leave --force
Prune container data.
docker system prune -all
Run the
install.ps1script using theuninstallflag to remove MCR from the system.
Use MCR with Kubernetes
Customers who use MCR with Kubernetes directly (without MKE) must use a
plugin maintained by Kubernetes called dockershim for Kubernetes 1.23 and
below or a plugin maintained by Mirantis called cri-docker (included in
MCR) for Kubernetes 1.24 and above.
To configure cri-docker:
systemctl enable cri-docker.service
Open Source Components and Licenses
Warning
In correlation with the end of life (EOL) date for MCR 19.03.8+, Mirantis stopped maintaining this documentation version as of 2022-05-27. The latest MCR product documentation is available here.
Click any product component license below to download a text file of that license to your local system.
Get Support
Warning
In correlation with the end of life (EOL) date for MCR 19.03.8+, Mirantis stopped maintaining this documentation version as of 2022-05-27. The latest MCR product documentation is available here.
Subscriptions for MKE, MSR, and MCR provide access to prioritized support for designated contacts from your company, agency, team, or organization. Mirantis service levels for MKE, MSR, and MCR are based on your subscription level and the Cloud (or cluster) you designate in your technical support case. Our support offerings are described here, and if you do not already have a support subscription, you may inquire about one via the contact us form.
Mirantis’ primary means of interacting with customers who have technical issues with MKE, MSR, or MCR is our CloudCare Portal. Access to our CloudCare Portal requires prior authorization by your company, agency, team, or organization, and a brief email verification step. After Mirantis sets up its back end systems at the start of the support subscription, a designated administrator at your company, agency, team or organization, can designate additional contacts. If you have not already received and verified an invitation to our CloudCare Portal, contact your local designated administrator, who can add you to the list of designated contacts. Most companies, agencies, teams, and organizations have multiple designated administrators for the CloudCare Portal, and these are often the persons most closely involved with the software. If you don’t know who is a local designated administrator, or are having problems accessing the CloudCare Portal, you may also send us an email.
Once you have verified your contact details via our verification email, and changed your password as part of your first login, you and all your colleagues will have access to all of the cases and resources purchased. We recommend you retain your ‘Welcome to Mirantis’ email, because it contains information on accessing our CloudCare Portal, guidance on submitting new cases, managing your resources, and so forth. Thus, it can serve as a reference for future visits.
We encourage all customers with technical problems to use the knowledge base, which you can access on the Knowledge tab of our CloudCare Portal. We also encourage you to review the MKE, MSR, and MCR products documentation which includes release notes, solution guides, and reference architectures. These are available in several formats. We encourage use of these resources prior to filing a technical case; we may already have fixed the problem in a later release of software, or provided a solution or technical workaround to a problem experienced by other customers.
One of the features of the CloudCare Portal is the ability to associate cases with a specific MKE cluster; these are known as “Clouds” in our portal. Mirantis has pre-populated customer accounts with one or more Clouds based on your subscription(s). Customers may also create and manage their Clouds to better match how you use your subscription.
We also recommend and encourage our customers to file new cases based on a specific Cloud in your account. This is because most Clouds also have associated support entitlements, licenses, contacts, and cluster configurations. These greatly enhance Mirantis’ ability to support you in a timely manner.
You can locate the existing Clouds associated with your account by using the “Clouds” tab at the top of the portal home page. Navigate to the appropriate Cloud, and click on the Cloud’s name. Once you’ve verified that Cloud represents the correct MKE cluster and support entitlement, you can create a new case via the New Case button towards the top of the Cloud’s page.
One of the key items required for technical support of most MKE, MSR, and MCR cases is the support dump. This is a compressed archive of configuration data and log files from the cluster. There are several ways to gather a support dump, each described in the paragraphs below. After you have collected a support dump, you can upload the dump to your new technical support case by following this guidance and using the “detail” view of your case.
Use the Web UI to get a support dump
To get the support dump from the web UI:
Log into the MKE web UI with an administrator account.
In the top-left menu, click your username and choose Support Dump.
It may take a few minutes for the download to complete.
To submit the support dump to Mirantis Customer Support:
Click Share support bundle on the success prompt that displays when the support dump finishes downloading.
Fill in the Jira feedback dialog, and click Submit.
Use the CLI to get a support dump
To get the support dump from the CLI, use SSH to log into a node and run:
MKE_VERSION=$((docker container inspect ucp-proxy --format '{{index .Config.Labels "com.docker.ucp.version"}}' 2>/dev/null || echo -n 3.2.6)|tr -d [[:space:]])
docker container run --rm \
--name ucp \
-v /var/run/docker.sock:/var/run/docker.sock \
--log-driver none \
mirantis/ucp:${MKE_VERSION} \
support > \
docker-support-${HOSTNAME}-$(date +%Y%m%d-%H_%M_%S).tgz
Note
The support dump only contains logs for the node where you’re running the command. If your MKE is highly available, you should collect support dumps from all of the manager nodes.
To submit the support dump to Mirantis Customer Support, add the --submit option to the support command. This will send the support dump along with the following information:
Cluster ID
MKE version
MCR version
OS/architecture
Cluster size
Use PowerShell to get a support dump
On Windows worker nodes, run the following command to generate a local support dump:
docker container run --name windowssupport -v 'C:\ProgramData\docker\daemoncerts:C:\ProgramData\docker\daemoncerts' -v 'C:\Windows\system32\winevt\logs:C:\eventlogs:ro' mirantis/ucp-dsinfo-win:3.2.6; docker cp windowssupport:'C:\dsinfo' .; docker rm -f windowssupport
This command creates a directory named dsinfo in your current directory. If you want an archive file, you need to create it from the dsinfo directory.
Release Notes
Warning
In correlation with the end of life (EOL) date for MCR 19.03.8+, Mirantis stopped maintaining this documentation version as of 2022-05-27. The latest MCR product documentation is available here.
This document describes the latest changes, enhancements, known issues, and fixes for Mirantis Container Runtime (MCR) for versions 19.03.x.
19.03.23
Important
MCR 19.03.23 is the final patch release for MCR 19.03.x as that version of the software reached end of life (EOL) status on 2022-05-27. In correlation, Mirantis has halted maintenance of the MCR 19.03.x documentation set.
(2022-06-21)
Components
Component |
Version |
|---|---|
Mirantis Container Runtime |
19.03.23 |
containerd |
1.6.6 |
runc |
1.1.2 |
Packaging
Updated contained to 1.6.6, to address CVE-2022-31030.
Known issues
A Windows port conflict on the daemon side requires a pending upstream fix on the Windows side (hostnetsvc.dll) (FIELD-4218) (moby/moby#43644).
19.03.22
(2022-04-05)
Components
Component |
Version |
|---|---|
Mirantis Container Runtime |
19.03.22 |
containerd |
1.5.11 |
runc |
1.0.3 |
Packaging
Fixed an
install.p1issue pertaining to errors that occurred when using offline mode (FIELD-4602).Updated containerd to version 1.5.11 to address CVE-2022-23648 and CVE-2022-24769).
Removed the
docker clusterplugin.
19.03.21
(2022-02-10)
Components
Component |
Version |
|---|---|
Mirantis Container Runtime |
19.03.21 |
containerd |
1.4.12 |
runc |
1.0.2 |
Runtime
Added garbage collection for image layers (moby/moby#40412).
Known issues
The removal of the
ipaSELinux module from the base system configuration of Red Hat Enterprise Linux 8.4 strippedcontainer_exec_tprocesses inside containers of their ability to readpidfile-labeled files, includingconttainer_var_run_t.Workaround:
Workflows that rely on bind mounting the Docker socket in a container running on RHEL 8.4 or later should mount the socket with
--security-opt=disableor an SELinux mount option, such asZ.
19.03.20
(2021-12-21)
Components
Component |
Version |
|---|---|
Mirantis Container Runtime |
19.03.20 |
containerd |
1.4.12 |
runc |
1.0.2 |
Packaging
Updated containerd to version 1.4.12 to resolve CVE-2021-41190 (FIELD-4479).
19.03.19
(2021-10-28)
Components
Component |
Version |
|---|---|
Mirantis Container Runtime |
19.03.19 |
containerd |
1.4.11 |
runc |
1.0.2 |
Runtime
Fixed an issue wherein using a JWT license with an MKE instance that manages MCR caused MCR to log error messages (FIELD-4201).
Fixed an issue wherein the docker info and docker version commands did not properly display the MCR license information on nodes that do not belong to a swarm (FIELD-4180).
Packaging
Updated containerd to version 1.4.11 to resolve CVE-2021-41103.
19.03.18
(2021-08-19)
Components
Component |
Version |
|---|---|
Mirantis Container Runtime |
19.03.18 |
containerd |
1.4.8 |
runc |
1.0.0 |
Swarm
Fixed a SwarmKit bug in the log broker that caused the cluster sometimes to stop functioning (FIELD-3764).
Runtime
MCR now accepts only JWT licenses. To upgrade MCR, customers using a Docker Hub-issued license must first replace it with the new license version (ENGINE-486).
To request a JWT license, contact support@mirantis.com.
Packaging
Resolved CVE-2021-32760 by updating containerd to version 1.4.8.
Deprecation notes
In correlation with the End of Life date for MKE 3.2.x and MSR 2.7.x, Mirantis stopped maintaining the associated documentation set on 2021-07-21.
19.03.17
(2021-06-29)
Components
Component |
Version |
|---|---|
Mirantis Container Runtime |
19.03.17 |
containerd |
1.4.6 |
runc |
1.0.0-rc95 |
Networking
Fixed an issue wherein overlapping IP addresses could occur due to nodes failing to clean up their old load balancer IP addresses (FIELD-3915).
Packaging
Updated containerd to version 1.4.6 and runc to version 1.0.0-rc95 to address CVE-2021-30465 (ENGINE-482).
19.03.16
(2021-05-17)
Components
Component |
Version |
|---|---|
Mirantis Container Runtime |
19.03.16 |
containerd |
1.3.10 |
runc |
1.0.0-rc10 |
Packaging
Added a technical preview for cri-docker (previously known as dockershim).
Fixed an issue wherein killing containerd caused systemd to stop docker.
Networking
Fixed an issue wherein swarm service VIPs timed out from Windows containers, resulting in the following error in dockerd event logs:
Failed to add ILB policy for service service […] failed during hnsCallRawResponse: hnsCall failed in Win32: The specified port already exists.
The Windows Operating System update KB4577668 introduced the issue on October 13, 2020, affecting all versions of MCR (FIELD-3310).
Known issues
Centos and RHEL 7.x kernels may experience memory exhaustion due to slab cache usage. Because this is a kernel feature, the issue cannot be resolved with MCR code.
Workarounds:
(Recommended) Update to a kernel that supports setting
cgroups.memory=nokmemand apply the change (for customers using Centos or RHEL 7.7 and above).Increase the memory available to the machine for slab usage.
(FIELD-3466)
19.03.15
(2021-04-12)
Components
Component |
Version |
|---|---|
Mirantis Container Runtime |
19.03.15 |
containerd |
1.3.10 |
runc |
1.0.0-rc10 |
Security
Resolved CVE-2021-21285, thereby preventing invalid images from crashing the Docker daemon (ENGINE-437).
Resolved CVE-2021-21284, thereby preventing a remapped root from accessing the Docker state by locking down file permissions (ENGINE-437).
MCR now confirms that AppArmor and SELinux profiles are applied when building with BuildKit (ENGINE-437).
Resolved CVE-2021-21334, and in the process updated containerd to version 1.3.10 (ENGINE-437).
Client
MCR now evaluates contexts before import to reduce the risk of extracted files escaping the context store (ENGINE-437).
19.03.14
(2020-12-17)
Components
Component |
Version |
|---|---|
Mirantis Container Runtime |
19.03.14 |
containerd |
1.3.9 |
runc |
1.0.0-rc10 |
Engine
Fixed a memory leak related to the use of gcplogs (ENGINE-317).
Bumped libnetwork to address null dereference in error handling (ENGINE-317).
Runtime
Resolved an issue wherein containerd 1.7 binaries for RHEL 7.7 and 7.8 were missing (ENGINE-295).
Security
Resolved CVE-2020-15257 (ENGINE-322).
19.03.13
(2020-11-12)
Components
Component |
Version |
|---|---|
Docker Engine - Enterprise |
19.03.13 |
containerd |
1.3.7 |
runc |
1.0.0-rc10 |
Client
Bumped golang version to 1.13.15 to address CVE-2020-16845.
Fixed errors on close in config file write on Windows.
Fixed an issue wherein Docker does not gracefully logout for non-default registry.
Engine
Bumped to go1.13.13 to address CVE-2020-14039
Fixed license warning regression on Windows.
Fixed to Microsoft/hcsshim, to address issues in directory timestamps, log-rotation, and Windows container startup times.
Bumped vendor x/text to address CVE-2019-19794.
19.03.12
(2020-09-15)
Components
Component |
Version |
|---|---|
Mirantis Container Runtime |
19.03.12 |
containerd |
1.3.4 |
runc |
1.0.0-rc10 |
Client
Fixed a command-line input regression on Windows
Bumped to go1.13.13 to address CVE-2020-14039
Bumped golang.org/x/text to address CVE-2020-14040
Fix bug preventing logout from registry when using multiple config files (e.g. Windows vs WSL2 when using Docker Desktop)
Fix regression preventing context metadata to be read
Engine
Bumped to go1.13.13 to address CVE-2020-14039
Fixed license warning regression on Windows
Fixes to Microsoft/hcsshim to address issues in directory timestamps, log-rotation, and Windows container startup times.
Bump vendor x/text to address CVE-2019-19794
19.03.11
(2020-06-24)
Networking
Fix for ‘failed to get network during CreateEndpoint’
Disable IPv6 Router Advertisements to prevent address spoofing. CVE-2020-13401
Fix DNS fallback regression. moby/moby#41009
Fix potential panic upon restart. moby/moby#40809
Assign the correct network value to the default bridge Subnet field. moby/moby#40565
Client
Fix version negotiation with older MCR. docker/cli#2538
Avoid setting SSH flags through hostname. docker/cli#2560
Fix panic when DOCKER_CLI_EXPERIMENTAL is invalid. docker/cli#2558
Upgrade Golang to 1.13.12
Fix panic on single-character volumes. docker/cli#2471
Lazy daemon feature detection to avoid long timeouts on simple commands. docker/cli#2442
docker context inspect on Windows is now faster. docker/cli#2516
Runtime
Upgrade Golang to 1.13.12
overlay2: show backing filesystem. moby/moby#40652
Update CRIU to v3.13 “Silicon Willet”. moby/moby#40850
Use FILE_SHARE_DELETE for log files on Windows. moby/moby#40563
Rootless
Supports numeric ID in /etc/subuid and /etc/subgid. moby/moby#40951
Builder
buildkit: Fix concurrent map write panic when building multiple images in parallel. moby/moby#40780
buildkit: Fix issue preventing chowning of non-root-owned files between stages with userns. moby/moby#40955
Avoid creation of irrelevant temporary files on Windows. moby/moby#40877
Logging
Avoid situation preventing container logs to rotate due to closing a closed log file. moby/moby#40921
Security
apparmor: add missing rules for userns. moby/moby#40564
Swarm
Fix issue where single swarm manager is stuck in Down state after reboot. moby/moby#40831
tasks.db no longer grows indefinitely.
19.03.8
(2020-05-28)
Builder
builder-next: Fix deadlock issues in corner cases.
builder-next: Allow modern sign hashes for ssh forwarding.
builder-next: Clear onbuild rules after triggering.
builder-next: Fix issue with directory permissions when usernamespaces is enabled.
Bump hcsshim to fix docker build failing on Windows 1903.
Networking
Shorten controller ID in exec-root to not hit UNIX_PATH_MAX.
Fix panic in drivers/overlay/encryption.go.
Fix hwaddr set race between us and udev.
Runtime
Fix docker crash when creating namespaces with UID in /etc/subuid and /etc/ subgid
Fix rate limiting for logger, increase refill rate
seccomp: add 64-bit time_t syscalls
libnetwork: cleanup VFP during overlay network removal
Improve mitigation for CVE-2019-14271 for some nscd configuration.
overlay: remove modprobe execs.
selinux: display better error messages when setting file labels.
Speed up initial stats collection.
rootless: use certs.d from XDG_CONFIG_HOME.
Bump Golang 1.12.17.
Bump google.golang.org/grpc to v1.23.1.
Update containerd binary to v1.2.13.
Prevent showing stopped containers as running in an edge case.
Prevent potential lock.
Update to runc v1.0.0-rc10.
Fix possible runtime panic in Lgetxattr.
rootless: fix proxying UDP packets.
Client
Bump Golang 1.12.17.
Bump google.golang.org/grpc to v1.23.1.
Considerations
Upgrading to the product combination [MKE 3.3.x + MCR 19.03.x + SLES 15 SP3/RHEL 8] can fail due to nodes that are not ready and MKE system containers that do not start. To resolve this problem, refer to Avoid firewall conflicts.
In developing MCR 19.03.x, Mirantis has been transitioning from legacy Docker Hub-issued licenses to JWT licenses, as detailed below:
Versions 19.03.0 to 19.03.10: Docker Hub licenses only
Versions 19.03.11 to 19.03.17: Docker Hub licenses and JWT licenses
Versions 19.03.18 and later: JWT licenses only
Using a JWT license with an MKE instance that manages MCR causes the engine to log error messages in the daemon log file, though MCR does not fail. This applies to MKE 3.4.x versions prior to 3.4.6 and MKE 3.3.x versions prior to 3.3.13.
CentOS 8 entered EOL status as of 31-December-2021. For this reason, Mirantis no longer supports CentOS 8 for all versions of MCR. We encourage customers who are using CentOS 8 to migrate onto any one of the supported operating systems, as further bug fixes will not be forthcoming. Refer to the MCR 19.03 Compatibility Matrix for more information.
Release Compatibility Matrix
Warning
In correlation with the end of life (EOL) date for MCR 19.03.8+, Mirantis stopped maintaining this documentation version as of 2022-05-27. The latest MCR product documentation is available here.
MCR 19.03 Compatibility Matrix
Warning
In correlation with the end of life (EOL) date for MCR 19.03.8+, Mirantis stopped maintaining this documentation version as of 2022-05-27. The latest MCR product documentation is available here.
Mirantis Container Runtime (MCR) enables containers to run efficiently on any substrate, powering business critical applications at the world’s leading companies.
Mirantis validates MCR for the operating system environments specified here, adhering to the MKE 3.x, MSR, and MCR Maintenance Lifecycle. Support for MCR is defined in the Mirantis Cloud Native Platform Subscription Services agreement. ———
Note
OS distributed versions not listed in the following matrix are not supported under Standard Support Subscriptions. For such versions, contact your Mirantis rep to discuss support options.
Caution
CentOS 8 entered EOL status as of 31-December-2021. For this reason, Mirantis no longer supports CentOS 8 for all versions of MCR. We encourage customers who are using CentOS 8 to migrate onto any one of the supported operating systems, as further bug fixes will not be forthcoming.
MCR |
Max. supported Client API |
Platform |
Versions |
|---|---|---|---|
19.03.23 |
1.40 |
CentOS |
7.9.2009, 7.8.2003 |
Oracle Linux |
7.9, 7.8 |
||
RHEL |
8.6, 8.4, 7.9, 7.8 |
||
SLES |
15 SP3, 12 SP5 |
||
Ubuntu |
20.04.41, 20.04.3, 20.04.2, 20.04.1, 20.04, 18.04.6, 18.04.5, 18.04.4, 18.04.3, 18.04.2, 18.04.1, 18.04 |
||
Microsoft Windows Enterprise Server |
2019 |
||
19.03.22 |
1.40 |
CentOS |
7.9.2009, 7.8.2003 |
Oracle Linux |
7.9, 7.8 |
||
RHEL |
8.4, 8.2, 7.9, 7.8 |
||
SLES |
15 SP3, 12 SP5 |
||
Ubuntu |
20.04.41, 20.04.3, 20.04.2, 20.04.1, 20.04, 18.04.6, 18.04.5, 18.04.4, 18.04.3, 18.04.2, 18.04.1, 18.04 |
||
Microsoft Windows Enterprise Server |
2019 |
||
19.03.21 |
1.40 |
CentOS |
7.9.2009, 7.8.2003 |
Oracle Linux |
7.9, 7.8 |
||
RHEL |
8.4, 8.2, 7.9, 7.8 |
||
SLES |
15 SP3, 12 SP5 |
||
Ubuntu |
20.04.3, 20.04.2, 20.04.1, 20.04, 18.04.6, 18.04.5, 18.04.4, 18.04.3, 18.04.2, 18.04.1, 18.04 |
||
Microsoft Windows Enterprise Server |
2019 |
||
19.03.20 |
1.40 |
CentOS |
7.9.2009, 7.8.2003 |
Oracle Linux |
7.9, 7.8 |
||
RHEL |
8.4, 8.2, 8.1, 7.9, 7.8 |
||
SLES |
15 SP3, 15 SP2, 12 SP5 |
||
Ubuntu |
20.04.3, 20.04.2, 20.04.1, 20.04, 18.04.6, 18.04.5, 18.04.4, 18.04.3, 18.04.2, 18.04.1, 18.04 |
||
Microsoft Windows Enterprise Server |
2019 |
||
19.03.19 |
1.40 |
CentOS |
7.9.2009, 7.8.2003 |
Oracle Linux |
7.9, 7.8 |
||
RHEL |
8.4, 8.2, 8.1, 7.9, 7.8 |
||
SLES |
15 SP3, 15 SP2, 12 SP5 |
||
Ubuntu |
20.04.3, 20.04.2, 20.04.1, 20.04, 18.04.6, 18.04.5, 18.04.4, 18.04.3, 18.04.2, 18.04.1, 18.04 |
||
Microsoft Windows Enterprise Server |
2019 |
||
19.03.18 |
1.40 |
CentOS |
7.9.2009, 7.8.2003 |
Oracle Linux |
7.9, 7.8 |
||
RHEL |
8.3, 8.2, 8.1, 7.9, 7.8 |
||
SLES |
15 SP3, 15 SP2, 12 SP5 |
||
Ubuntu |
20.04.2, 20.04.1 20.04, 18.04.5, 18.04.4, 18.04.3, 18.04.2, 18.04.1, 18.04 |
||
Microsoft Windows Enterprise Server |
2019 |
||
19.03.17 |
1.40 |
CentOS |
7.9.2009, 7.8.2003 |
Oracle Linux |
7.9, 7.8 |
||
RHEL |
8.4, 8.2, 8.1, 7.9, 7.8 |
||
SLES |
15 SP3, 15 SP2, 12 SP5 |
||
Ubuntu |
20.04.2, 20.04.1 20.04, 18.04.5, 18.04.4, 18.04.3, 18.04.2, 18.04.1, 18.04 |
||
Microsoft Windows Enterprise Server |
2019 |
||
19.03.16 |
1.40 |
CentOS |
7.9.2009, 7.8.2003 |
Oracle Linux |
7.9, 7.8 |
||
RHEL |
8.4, 8.2, 8.1, 7.9, 7.8 |
||
SLES |
15 SP2, 12 SP5, |
||
Ubuntu |
20.04.2, 20.04.1 20.04, 18.04.5, 18.04.4, 18.04.3, 18.04.2, 18.04.1, 18.04 |
||
Microsoft Windows Enterprise Server |
2019 |
||
19.03.15 |
1.40 |
CentOS |
7.9.2009, 7.8.2003 |
Oracle Linux |
7.9, 7.8 |
||
RHEL |
8.3, 8.2, 8.1, 7.9, 7.8 |
||
SLES |
15 SP2, 12 SP5, |
||
Ubuntu |
20.04.2, 20.04.1 20.04, 18.04.5, 18.04.4, 18.04.3, 18.04.2, 18.04.1, 18.04 |
||
Microsoft Windows Enterprise Server |
2019 |
||
19.03.14 |
1.40 |
CentOS |
7.9.2009, 7.8.2003 |
Oracle Linux |
7.9, 7.8 |
||
RHEL |
8.3, 8.2, 8.1, 8, 7.9, 7.8 |
||
SLES |
15 SP2, 15 SP1, 12 SP5 |
||
Ubuntu |
18.04 |
||
Microsoft Windows Enterprise Server |
2019 |
||
19.03.13 |
1.40 |
CentOS |
7.9.2009, 7.8.2003 |
Oracle Linux |
7.9, 7.8 |
||
RHEL |
8.3, 8.2, 8.1, 8, 7.9, 7.8 |
||
SLES |
15 SP2, 15 SP1, 12 SP5 |
||
Ubuntu |
18.04 |
||
Microsoft Windows Enterprise Server |
2019 |
||
19.03.12 |
1.40 |
CentOS |
7.9.2009, 7.8.2003 |
Oracle Linux |
7.9, 7.8 |
||
RHEL |
8.3, 8.2, 8.1, 8, 7.9, 7.8 |
||
SLES |
15 SP2, 15 SP1, 12 SP5 |
||
Ubuntu |
18.04 |
||
Microsoft Windows Enterprise Server |
2019 |
||
19.03.8 |
1.40 |
CentOS |
7.9.2009, 7.8.2003 |
Oracle Linux |
Not applicable |
||
RHEL |
8.3, 8.2, 8.1, 8, 7.9, 7.8 |
||
SLES |
Not applicable |
||
Ubuntu |
18.04 |
||
Microsoft Windows Enterprise Server |
2019 |
1 A known critical issue is present in the 5.13.0-1028-aws and
5.13.0-1029-aws kernels of the Ubuntu AMIs on AWS. The issue was
resolved in the 5.13.0-1030-aws kernel. If you are an AWS user, refer to
Docker container creation causes kernel oops on linux-aws
5.13.0.1028.31~20.04.22 and
Docker container ports cannot be allocated,
otherwise check with your cloud provider.
MKE 3.x, MSR, and MCR Maintenance Lifecycle
The MKE, MSR, and MCR platform subscription provides software, support, and certification to enterprise development and IT teams that build and manage critical apps in production at scale. It provides a trusted platform for all apps which supply integrated management and security across the app lifecycle, comprised primarily of Mirantis Kubernetes Engine, Mirantis Secure Registry (MSR), and Mirantis Container Runtime (MCR).
Mirantis validates the MKE, MSR, and MCR platform for the operating system environments specified in the MCR compatibility matrix, adherring to the maintenance lifecycle detailed here. Support for the MKE, MSR, and MCR platform is defined in the Mirantis Cloud Native Platform Subscription Services agreement.
Detailed here are all currently supported product versions, as well as the product versions most recently deprecated. It can be assumed that all earlier product versions are at End of Life (EOL).
Important Definitions
“Major Releases” (X.y.z): Vehicles for delivering major and minor feature development and enhancements to existing features. They incorporate all applicable Error corrections made in prior Major Releases, Minor Releases, and Maintenance Releases.
“Minor Releases” (x.Y.z): Vehicles for delivering minor feature developments, enhancements to existing features, and defect corrections. They incorporate all applicable Error corrections made in prior Minor Releases, and Maintenance Releases.
“Maintenance Releases” (x.y.Z): Vehicles for delivering Error corrections that are severely affecting a number of customers and cannot wait for the next major or minor release. They incorporate all applicable defect corrections made in prior Maintenance Releases.
“End of Life” (EOL): Versions are no longer supported by Mirantis, updating to a later version is recommended.
GA to 12 months |
12 to 18 months |
18 to 24 months |
|---|---|---|
Full support |
Full support 1 |
Limited Support for existing installations 2 |
1 Software patches for critical bugs and security issues only; no feature enablement.
2 Software patches for critical security issues only.
Mirantis Kubernetes Engine (MKE)
3.9.z |
3.8.z |
|
|---|---|---|
General Availability (GA) |
2026-MAR-24 (3.9.0) |
2024-DEC-4 (3.8.0) |
End of Life (EOL) |
2028-MAR-24 |
2026-DEC-4 |
Release frequency |
x.y.Z every 8 weeks |
x.y.Z every 8 weeks |
Patch release content |
As needed:
|
As needed:
|
Supported lifespan |
2 years 1 |
2 years 1 |
1 Refer to the Support lifecycle table for details.
EOL MKE Versions
MKE Version |
EOL date |
|---|---|
2.0.z |
2017-AUG-16 |
2.1.z |
2018-FEB-07 |
2.2.z |
2019-NOV-01 |
3.0.z |
2020-APR-16 |
3.1.z |
2020-NOV-06 |
3.2.z |
2021-JUL-21 |
3.3.z |
2022-MAY-27 |
3.4.z |
2023-APR-11 |
3.5.z |
2023-NOV-22 |
3.6.z |
2023-OCT-13 |
3.7.z |
2025-AUG-29 |
Mirantis Secure Registry (MSR)
2.10.z |
2.9.z |
|
|---|---|---|
General Availability (GA) |
2026-JUL-07 (2.10.0) |
2021-APR-12 (2.9.0) |
End of Life (EOL) |
2028-JUL-07 |
2026-DEC-01 |
Release frequency |
x.y.Z every 8 weeks |
x.y.Z every 8 weeks |
Patch release content |
As needed:
|
As needed:
|
Supported lifespan |
2 years 1 |
2 years 1 |
1 Refer to the Support lifecycle table for details.
EOL MSR Versions
MSR Version |
EOL date |
|---|---|
2.1.z |
2017-AUG-16 |
2.2.z |
2018-FEB-07 |
2.3.z |
2019-FEB-15 |
2.4.z |
2019-NOV-01 |
2.5.z |
2020-APR-16 |
2.6.z |
2020-NOV-06 |
2.7.z |
2021-JUL-21 |
2.8.z |
2022-MAY-27 |
3.0.z |
2024-APR-20 |
3.1.z |
2025-SEP-27 |
Mirantis Container Runtime (MCR)
Enterprise 29.0 |
Enterprise 25.0 |
|
|---|---|---|
General Availability (GA) |
2026-MAR-24 (29.2.1) |
2024-DEC-04 (25.0.7) |
End of Life (EOL) |
2028-MAR-24 |
2026-DEC-04 |
Release frequency |
x.y.Z every 8 weeks |
x.y.Z every 8 weeks |
Patch release content |
As needed:
|
As needed:
|
Supported lifespan |
2 years 1 |
2 years 1 |
1 Refer to the Support lifecycle table for details.
EOL MCR Versions
MCR Version |
EOL date |
|---|---|
CSE 1.11.z |
2017-MAR-02 |
CSE 1.12.z |
2017-NOV-14 |
CSE 1.13.z |
2018-FEB-07 |
EE 17.03.z |
2018-MAR-01 |
Docker Engine - Enterprise v17.06 |
2020-APR-16 |
Docker Engine - Enterprise 18.03 |
2020-JUN-16 |
Docker Engine - Enterprise 18.09 |
2020-NOV-06 |
Docker Engine - Enterprise 19.03 |
2021-JUL-21 |
MCR 19.03.8+ |
2022-MAY-27 |
MCR 20.10.0+ |
2023-DEC-10 |
MCR 23.0.0+ |
2025-JUN-04 |
QuickStart: MCR on Ubuntu
Warning
In correlation with the end of life (EOL) date for MCR 19.03.8+, Mirantis stopped maintaining this documentation version as of 2022-05-27. The latest MCR product documentation is available here.
Use this QuickStart guide to quickly deploy Mirantis Container Runtime (MCR) to Ubuntu systems from the repository.
Introduction
MCR installations includes the following components:
MCR engine
MCR CLI
containerd
runc
After installing MCR, you will be able to:
Use Dockerfiles to build and run images as containers.
Share images using Docker Hub.
Run applications using Docker Compose.
The following diagram illustrates the workflow for installing MCR on Ubuntu:
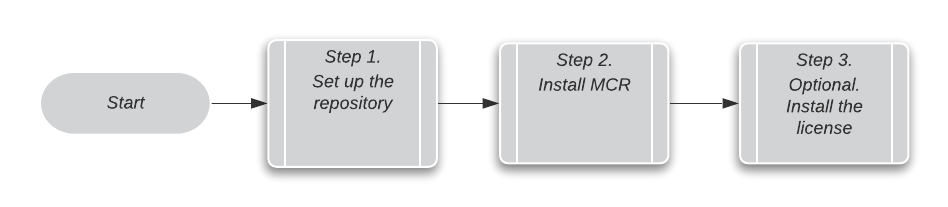
Set up the repository
To install MCR using the Mirantis repository you must first set up the repository on the host machine.
Note
MCR only supports x86_64/amd64.
Update the
aptpackage index:sudo apt-get update
Install packages that allow
aptto use a repository over HTTPS:sudo apt-get install \ apt-transport-https \ ca-certificates \ curl \ software-properties-common
Store
https://repos.mirantis.comin an environment variable:DOCKER_EE_URL="https://repos.mirantis.com"
Add a
$DOCKER_EE_VERSIONvariable into your environment.DOCKER_EE_VERSION=<mcr-version>
Add Docker’s official GPG key:
curl -fsSL "${DOCKER_EE_URL}/ubuntu/gpg" | sudo apt-key add -
Verify that you now have the key with the fingerprint
DD91 1E99 5A64 A202 E859 07D6 BC14 F10B 6D08 5F96by searching for the last eight characters of the fingerprint:sudo apt-key fingerprint 6D085F96 pub 4096R/0EBFCD88 2017-02-22 Key fingerprint = DD91 1E99 5A64 A202 E859 07D6 BC14 F10B 6D08 5F96 uid Docker Release (EE deb) <docker@docker.com> sub 4096R/6D085F96 2017-02-22
Use the following command to set up the stable repository:
sudo add-apt-repository \ "deb [arch=$(dpkg --print-architecture)] $DOCKER_EE_URL/ubuntu \ $(lsb_release -cs) \ stable-$DOCKER_EE_VERSION"
Install MCR
Install the latest version of MCR and containerd:
sudo apt-get install docker-ee docker-ee-cli containerd.io
Note
To install a specific version of MCR:
sudo apt-get install docker-ee=<VERSION_STRING> docker-ee-cli=<VERSION_STRING> containerd.io
Start Docker:
sudo systemctl start docker
Verify that you installed MCR correctly:
sudo docker run hello-world
This command downloads a test image and runs it in a container. If successful, the command prints the following informational message and exits:
Hello from Docker! This message shows that your installation appears to be working correctly. To generate this message, Docker took the following steps: 1. The Docker client contacted the Docker daemon. 2. The Docker daemon pulled the "hello-world" image from the Docker Hub. (amd64) 3. The Docker daemon created a new container from that image which runs the executable that produces the output you are currently reading. 4. The Docker daemon streamed that output to the Docker client, which sent it to your terminal. To try something more ambitious, you can run an Ubuntu container with: $ docker run -it ubuntu bash Share images, automate workflows, and more with a free Docker ID: https://hub.docker.com/ For more examples and ideas, visit: https://docs.docker.com/get-started/
Install the license
An MCR license gives the user access to Mirantis Support. You can complete this guide and start using MCR right away, and install the license later.
To install the MCR license:
Purchase an MCR subscription or contact Mirantis for more information.
Follow the link to download your MCR license file found in the confirmation email you received after purchasing MCR from the Mirantis web store. If you cannot access your confirmation email, contact Mirantis.
Copy the file to the data root directory and name it
docker.lic. The default data root directory is/var/lib/docker.Restart MCR:
sudo systemctl restart docker
Verify the installation:
sudo docker info | grep -i license
What’s next
Refer to Install Mirantis Container Runtime for Ubuntu to learn about these additional installation topics:
Uninstall Mirantis Container Runtime (including old versions)
Begin using Docker Hub to find and share images.
Install Mirantis Kubernetes Engine (MKE) and Mirantis Secure Registry (MSR).
Learn about all the components of Mirantis Cloud Native Platform.
QuickStart: MCR on CentOS
Warning
In correlation with the end of life (EOL) date for MCR 19.03.8+, Mirantis stopped maintaining this documentation version as of 2022-05-27. The latest MCR product documentation is available here.
Use this QuickStart guide to quickly deploy Mirantis Container Runtime (MCR) to CentOS systems from the repository.
Introduction
MCR installations includes the following components:
MCR engine
MCR CLI
containerd
runc
After installing MCR, you will be able to:
Use Dockerfiles to build and run images as containers.
Share images using Docker Hub.
Run applications using Docker Compose.
The following diagram illustrates the workflow for installing MCR on CentoOS:
Set up the repository
You only need to set up the repository once, after which you can install MCR
from the repository and upgrade as needed. MCR supports the latest version of
CentOS 64-bit running on x86_64.
Note
MCR supports the overlay2 storage drivers on CentOS. The following
limitations apply:
If you enable
selinux, MCR supportsoverlay2on CentoOS 7.4 and higher.If you disable
selinux, MCR supportsoverlay2on CentOS 7.2 and higher, with kernel version 3.10.0-693 and higher.
Remove any existing Docker repositories from
/etc/yum.repos.d/:sudo rm /etc/yum.repos.d/docker*.repo
Store
https://repos.mirantis.comin an environment variable:export DOCKERURL="https://repos.mirantis.com"
Store the value of
DOCKERURLusing ayumvariable in/etc/yum/vars/:sudo -E sh -c \ 'echo "$DOCKERURL/centos" > /etc/yum/vars/dockerurl'
Store your operating system version string in
/etc/yum/vars/dockerosversion:sudo sh -c 'echo "<version>" > /etc/yum/vars/dockerosversion'
Install the
yum-utilsthat provides theyum-config-managerutility:sudo yum install -y yum-utils
Enable the extras RHEL repository to ensure access to the
container-selinuxpackage thatdocker-eerequires:sudo yum-config-manager --enable rhel-7-server-extras-rpms
sudo yum-config-manager --enable extras sudo subscription-manager repos \ --enable=rhel-7-for-power-le-extras-rpms sudo yum makecache fast sudo yum -y install container-selinux
AWS and Azure require that you enable another repository:
sudo yum install -y rh-amazon-rhui-client
sudo yum-config-manager --enable rhui-REGION-rhel-server-extras
Note that REGION is a literal. It does not represent the region your machine is running in.
sudo yum-config-manager --enable rhui-rhel-7-server-rhui-extras-rpms
Add the stable MCR repository:
sudo -E yum-config-manager \ --add-repo "$DOCKERURL/centos/docker-ee.repo"
Install MCR
Install the latest version of MCR and containerd:
sudo yum -y install docker-ee docker-ee-cli containerd.io
If prompted to accept the GPG key, verify that the fingerprint matches
77FE DA13 1A83 1D29 A418 D3E8 99E5 FF2E 7668 2BC9and accept it.Note
To install a specific version of MCR:
Download the three packages required for the desired MCR version from https://repos.mirantis.com/rhel/8/x86_64/stable-19.03/Packages/.
Run the following command to complete the MCR installation.
sudo yum -y install docker-ee-<version-string> \ docker-ee-cli-<version-string> containerd.io
Start Docker:
sudo systemctl start docker
Verify that you installed MCR correctly:
sudo docker run hello-world
This command downloads a test image and runs it in a container. If successful, it prints the following informational message and exits:
Hello from Docker! This message shows that your installation appears to be working correctly. To generate this message, Docker took the following steps: 1. The Docker client contacted the Docker daemon. 2. The Docker daemon pulled the "hello-world" image from the Docker Hub. (amd64) 3. The Docker daemon created a new container from that image which runs the executable that produces the output you are currently reading. 4. The Docker daemon streamed that output to the Docker client, which sent it to your terminal. To try something more ambitious, you can run an Ubuntu container with: $ docker run -it ubuntu bash Share images, automate workflows, and more with a free Docker ID: https://hub.docker.com/ For more examples and ideas, visit: https://docs.docker.com/get-started/
Install the license
An MCR license gives the user access to Mirantis Support. You can complete this guide and start using MCR right away, and install the license later.
To install the MCR license:
Purchase an MCR subscription or contact Mirantis for more information.
Follow the link to download your MCR license file found in the confirmation email you received after purchasing MCR from the Mirantis web store. If you cannot access your confirmation email, contact Mirantis.
Copy the file to the data root directory and name it
docker.lic. The default data root directory is/var/lib/docker.Restart MCR:
sudo systemctl restart docker
Verify the installation:
sudo docker info | grep -i license
What’s next
Refer to Install Mirantis Container Runtime for CentOS to learn about these additional installation topics:
Uninstall Mirantis Container Runtime (including old versions)
Begin using Docker Hub to find and share images.
Install Mirantis Kubernetes Engine (MKE) and Mirantis Secure Registry (MSR).
Learn about all the components of Mirantis Cloud Native Platform.
QuickStart: MCR on Oracle Linux
Warning
In correlation with the end of life (EOL) date for MCR 19.03.8+, Mirantis stopped maintaining this documentation version as of 2022-05-27. The latest MCR product documentation is available here.
Use this QuickStart guide to quickly deploy Mirantis Container Runtime (MCR) to Oracle Linux systems from the repository.
Note
The documentation herein applies only to Oracle Linux 7. Mirantis does not support Oracle 8.
Introduction
MCR installations includes the following components:
MCR engine
MCR CLI
containerd
runc
After installing MCR, you will be able to:
Use Dockerfiles to build and run images as containers.
Share images using Docker Hub.
Run applications using Docker Compose.
The following diagram illustrates the workflow for installing MCR on Oracle Linux:
Set up the repository
Note
The documentation herein applies only to Oracle Linux 7. Mirantis does not support Oracle 8.
You only need to set up the repository once, after which you can install MCR from the repository and upgrade as needed.
MCR supports Oracle Linux 64-bit version 7.8 or later and Red Hat Compatible Kernel (RHCK) version 3.10.0-1127 or later.
Note
Mirantis recommends using fast storage, such as solid-state media.
Remove any existing Docker repositories from
/etc/yum.repos.d/:sudo rm /etc/yum.repos.d/docker*.repo
Store
https://repos.mirantis.comin an environment variable:export DOCKERURL="https://repos.mirantis.com"
Store the value of
DOCKERURLusing ayumvariable in/etc/yum/vars/:sudo -E sh -c \ 'echo "$DOCKERURL/oraclelinux" > /etc/yum/vars/dockerurl'
Install
yum-utilsto get theyum-config-managerutility:sudo yum install -y yum-utils
Enable the Oracle
ol7_addonsrepository to ensure that you have access to thecontainer-selinuxpackage thatdocker-eerequires:sudo yum-config-manager --enable ol7_addons
Add the stable MCR repository:
sudo -E yum-config-manager \
  --add-repo \
  "$DOCKERURL/oraclelinux/docker-ee.repo"
Install MCR
Note
The documentation herein applies only to Oracle Linux 7. Mirantis does not support Oracle 8.
Install the latest version of MCR and containerd:
sudo yum -y install docker-ee docker-ee-cli containerd.io
If prompted to accept the GPG key, verify that the fingerprint matches
77FE DA13 1A83 1D29 A418 D3E8 99E5 FF2E 7668 2BC9and accept it.Note
To install a specific version of MCR:
Download the three packages required for the desired MCR version from https://repos.mirantis.com/oraclelinux/7/x86_64/stable-19.03/Packages/.
Run the following commands to complete the MCR installation.
sudo yum -y install container-selinux libseccomp libseccomp.so.2 sudo yum -y --disablerepo="*" --enablerepo="docker-ee-stable-19.03" install docker-ee docker-ee-cli containerd.io
Start Docker:
sudo systemctl start docker
Verify that you installed MCR correctly:
sudo docker run hello-world
This command downloads a test image and runs it in a container. If successful, it prints the following informational message and exits:
Hello from Docker! This message shows that your installation appears to be working correctly. To generate this message, Docker took the following steps: 1. The Docker client contacted the Docker daemon. 2. The Docker daemon pulled the "hello-world" image from the Docker Hub. (amd64) 3. The Docker daemon created a new container from that image which runs the executable that produces the output you are currently reading. 4. The Docker daemon streamed that output to the Docker client, which sent it to your terminal. To try something more ambitious, you can run an Ubuntu container with: $ docker run -it ubuntu bash Share images, automate workflows, and more with a free Docker ID: https://hub.docker.com/ For more examples and ideas, visit: https://docs.docker.com/get-started/
Install the license
An MCR license gives the user access to Mirantis Support. You can complete this guide and start using MCR right away, and install the license later.
To install the MCR license:
Purchase an MCR subscription or contact Mirantis for more information.
Follow the link to download your MCR license file found in the confirmation email you received after purchasing MCR from the Mirantis web store. If you cannot access your confirmation email, contact Mirantis.
Copy the file to the data root directory and name it
docker.lic. The default data root directory is/var/lib/docker.Restart MCR:
sudo systemctl restart docker
Verify the installation:
sudo docker info | grep -i license
What’s next
Refer to Install Mirantis Container Runtime for Oracle Linux to learn about these additional installation topics:
Begin using Docker Hub to find and share images
Install Mirantis Kubernetes Engine (MKE) and Mirantis Secure Registry (MSR)
Learn about other components of Mirantis Cloud Native Platform
QuickStart: MCR on RHEL
Warning
In correlation with the end of life (EOL) date for MCR 19.03.8+, Mirantis stopped maintaining this documentation version as of 2022-05-27. The latest MCR product documentation is available here.
Use this QuickStart guide to quickly deploy Mirantis Container Runtime (MCR) to Red Hat Enterprise Linux (RHEL) systems from the repository.
Introduction
MCR installations includes the following components:
MCR engine
MCR CLI
containerd
runc
After installing MCR, you will be able to:
Use Dockerfiles to build and run images as containers.
Share images using Docker Hub.
Run applications using Docker Compose.
The following diagram illustrates the workflow for installing MCR on RHEL:
Set up the repository
You only need to set up the repository once, after which you can install MCR from the repository and upgrade as needed. MCR supports RHEL 64-bit version 7.4 and higher running on x86_64.
Note
MCR supports the overlay2 storage drivers on RHEL. The following
limitations apply:
If you enable
selinux, MCR supportsoverlay2on RHEL 7.4 and higher (OverlayFS).If you disable
selinux, MCR supportsoverlay2on RHEL 7.2 and higher, with kernel version 3.10.0-693 and higher.
Set up the repository for RHEL 7
Remove existing Docker repositories from
/etc/yum.repos.d/:sudo rm /etc/yum.repos.d/docker*.repo
Store
https://repos.mirantis.comin an environment variable:export DOCKERURL="https://repos.mirantis.com"
Store the value of
DOCKERURLusing ayumvariable in/etc/yum/vars/:sudo -E sh -c 'echo "$DOCKERURL/rhel" > /etc/yum/vars/dockerurl'
Store your OS version string in
/etc/yum/vars/dockerosversion. Use7or include the minor version starting with7.2:sudo sh -c 'echo "<version>" > /etc/yum/vars/dockerosversion'
Install the
yum-utilsthat provides theyum-config-managerutility:sudo yum install -y yum-utils
Enable the extras RHEL repository to ensure access to the
container-selinuxpackage thatdocker-eerequires:sudo yum-config-manager --enable rhel-7-server-extras-rpms
sudo yum-config-manager --enable extras sudo subscription-manager repos \ --enable=rhel-7-for-power-le-extras-rpms sudo yum makecache fast sudo yum -y install container-selinux
Enable another repository for AWS and Azure:
sudo yum install -y rh-amazon-rhui-client

sudo yum-config-manager --enable rhui-REGION-rhel-server-extras
REGIONis a literal. It does not represent the region your machine is running in.sudo yum-config-manager --enable rhui-rhel-7-server-rhui-extras-rpms
Add the stable MCR repository:
sudo -E yum-config-manager \
     --add-repo \
     "$DOCKERURL/rhel/docker-ee.repo"
Set up the repository for RHEL 8
Remove existing Docker repositories from
/etc/yum.repos.d/:sudo rm /etc/yum.repos.d/docker*.repo
Store
https://repos.mirantis.comin an environment variable.export DOCKERURL="https://repos.mirantis.com"
Store the value of
DOCKERURLusing ayumvariable in/etc/yum/vars/:sudo -E sh -c 'echo "$DOCKERURL/rhel" > /etc/yum/vars/dockerurl'
Store your OS version string in
/etc/yum/vars/dockerosversion. Use8or include the minor version (for example,8.1):sudo sh -c 'echo "<version>" > /etc/yum/vars/dockerosversion'
Install the
yum-utilsthat provides theyum-config-managerutility:sudo yum install -y yum-utils
Add the stable MCR repository:
sudo -E yum-config-manager \
  --add-repo \
  "$DOCKERURL/rhel/docker-ee.repo"
Install MCR
Install the latest version of MCR and containerd:
sudo yum -y install container-selinux sudo yum -y --disablerepo="*" --enablerepo="docker-ee-stable-19.03" install docker-ee docker-ee-cli containerd.io
sudo yum -y install container-selinux sudo yum -y --disablerepo="*" --enablerepo="docker-ee-stable-19.03" install docker-ee docker-ee-cli containerd.io
If prompted to accept the GPG key, verify that the fingerprint matches
77FE DA13 1A83 1D29 A418 D3E8 99E5 FF2E 7668 2BC9and accept it.Note
To install a specific version of MCR:
Download the three packages required for the desired MCR version from https://repos.mirantis.com/rhel/8/x86_64/stable-20.10/Packages/.
Run the following command to complete the MCR installation.
sudo yum -y install docker-ee-<version-string> \ docker-ee-cli-<version-string> containerd.io
Start Docker:
sudo systemctl start docker
Verify that you installed MCR correctly:
sudo docker run hello-world
This command downloads a test image and runs it in a container. If successful, it prints the following informational message and exits:
Hello from Docker!
This message shows that your installation appears to be working correctly.

To generate this message, Docker took the following steps:
 1. The Docker client contacted the Docker daemon.
 2. The Docker daemon pulled the "hello-world" image from the Docker Hub.
    (amd64)
 3. The Docker daemon created a new container from that image which runs the
    executable that produces the output you are currently reading.
 4. The Docker daemon streamed that output to the Docker client, which sent it
    to your terminal.

To try something more ambitious, you can run an Ubuntu container with:
 $ docker run -it ubuntu bash

Share images, automate workflows, and more with a free Docker ID:
 https://hub.docker.com/

For more examples and ideas, visit:
 https://docs.docker.com/get-started/
Install the license
An MCR license gives the user access to Mirantis Support. You can complete this guide and start using MCR right away, and install the license later.
To install the MCR license:
Purchase an MCR subscription or contact Mirantis for more information.
Follow the link to download your MCR license file found in the confirmation email you received after purchasing MCR from the Mirantis web store. If you cannot access your confirmation email, contact Mirantis.
Copy the file to the data root directory and name it
docker.lic. The default data root directory is/var/lib/docker.Restart MCR:
sudo systemctl restart docker
Verify the installation:
sudo docker info | grep -i license
What’s next
Refer to Install Mirantis Container Runtime for Red Hat Enterprise Linux to learn about these additional installation topics:
Begin using Docker Hub to find and share images
Install Mirantis Kubernetes Engine (MKE) and Mirantis Secure Registry (MSR).
Learn about other components of Mirantis Cloud Native Platform.