Join Linux nodes to your cluster
Join Linux nodes to your cluster
Docker Enterprise is designed for scaling horizontally as your applications grow in size and usage. You can add or remove nodes from the cluster to scale it to your needs. You can join Windows Server and Linux nodes to the cluster.
Because Docker Enterprise leverages the clustering functionality provided by Docker Engine, you use the docker swarm join command to add more nodes to your cluster. When you join a new node, Docker Enterprise services start running on the node automatically.
Node roles
When you join a node to a cluster, you specify its role: manager or worker.
Manager: Manager nodes are responsible for cluster management functionality and dispatching tasks to worker nodes. Having multiple manager nodes allows your swarm to be highly available and tolerant of node failures.
Manager nodes also run all Docker Enterprise components in a replicated way, so by adding additional manager nodes, you’re also making the cluster highly available.
Worker: Worker nodes receive and execute your services and applications. Having multiple worker nodes allows you to scale the computing capacity of your cluster.
When deploying Docker Trusted Registry in your cluster, you deploy it to a worker node.
Join a node to the cluster
You can join Windows Server and Linux nodes to the cluster, but only Linux nodes can be managers.
To join nodes to the cluster, go to the UCP web interface and navigate to the Nodes page.
Click Add Node to add a new node.
Select the type of node to add, Windows or Linux.
Click Manager if you want to add the node as a manager.
Check the Use a custom listen address option to specify the address and port where new node listens for inbound cluster management traffic.
Check the Use a custom listen address option to specify the IP address that’s advertised to all members of the cluster for API access.
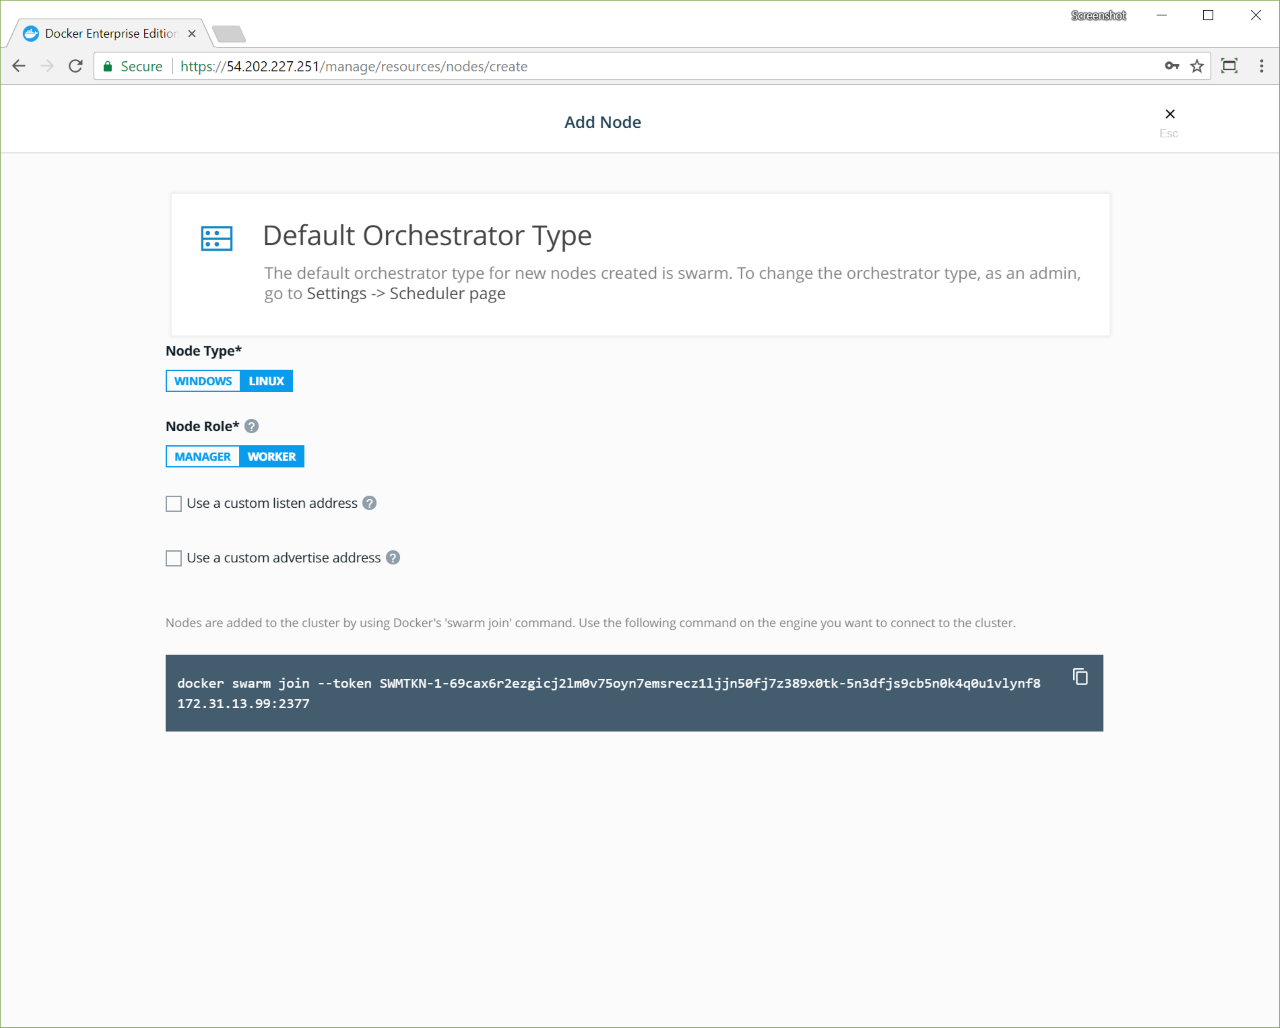
Copy the displayed command, use SSH to log in to the host that you want
to join to the cluster, and run the docker swarm join command on the
host.
To add a Windows node, click Windows and follow the instructions in Join Windows worker nodes to a cluster.
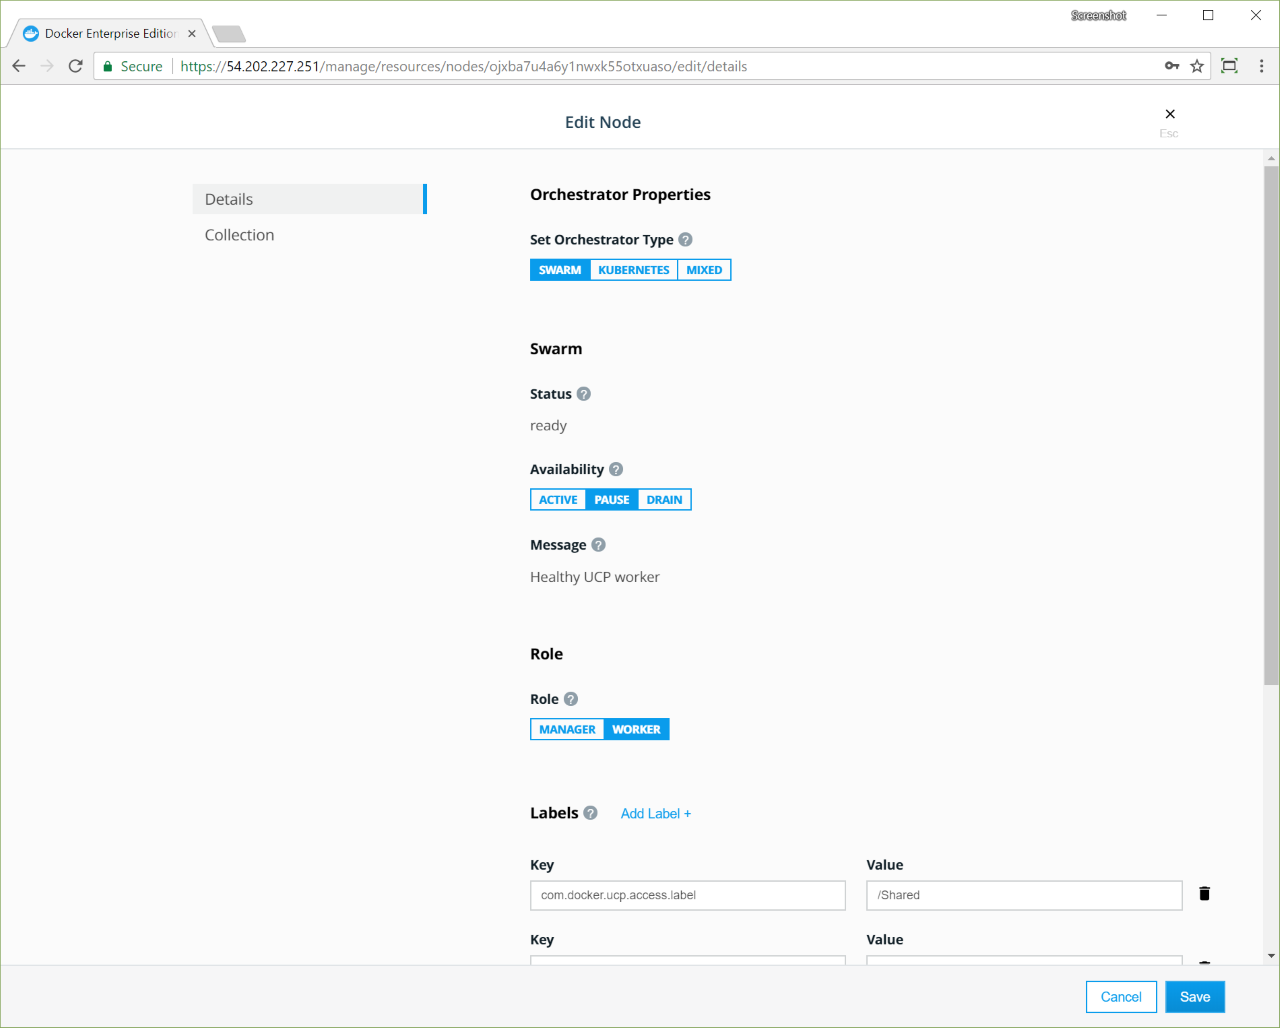
After you run the join command in the node, the node is displayed on the Nodes page in the UCP web interface. From there, you can change the node’s cluster configuration, including its assigned orchestrator type.
Pause or drain a node
Once a node is part of the cluster, you can configure the node’s availability so that it is:
- Active: the node can receive and execute tasks.
- Paused: the node continues running existing tasks, but doesn’t receive new tasks.
- Drained: the node won’t receive new tasks. Existing tasks are stopped and replica tasks are launched in active nodes.
Pause or drain a node from the Edit Node page:
In the UCP web interface, browse to the Nodes page and select the node.
In the details pane, click Configure and select Details to open the Edit Node page.
In the Availability section, click Active, Pause, or Drain.
Click Save to change the availability of the node.
Promote or demote a node
You can promote worker nodes to managers to make UCP fault tolerant. You can also demote a manager node into a worker.
To promote or demote a manager node:
- Navigate to the Nodes page, and click the node that you want to demote.
- In the details pane, click Configure and select Details to open the Edit Node page.
- In the Role section, click Manager or Worker.
- Click Save and wait until the operation completes.
- Navigate to the Nodes page, and confirm that the node role has changed.
If you are load balancing user requests to Docker Enterprise across multiple manager nodes, remember to remove these nodes from the load-balancing pool when demoting them to workers.
Remove a node from the cluster
Removing worker nodes
Worker nodes can be removed from a cluster at any time.
- Shut down the worker node or have it leave the swarm.
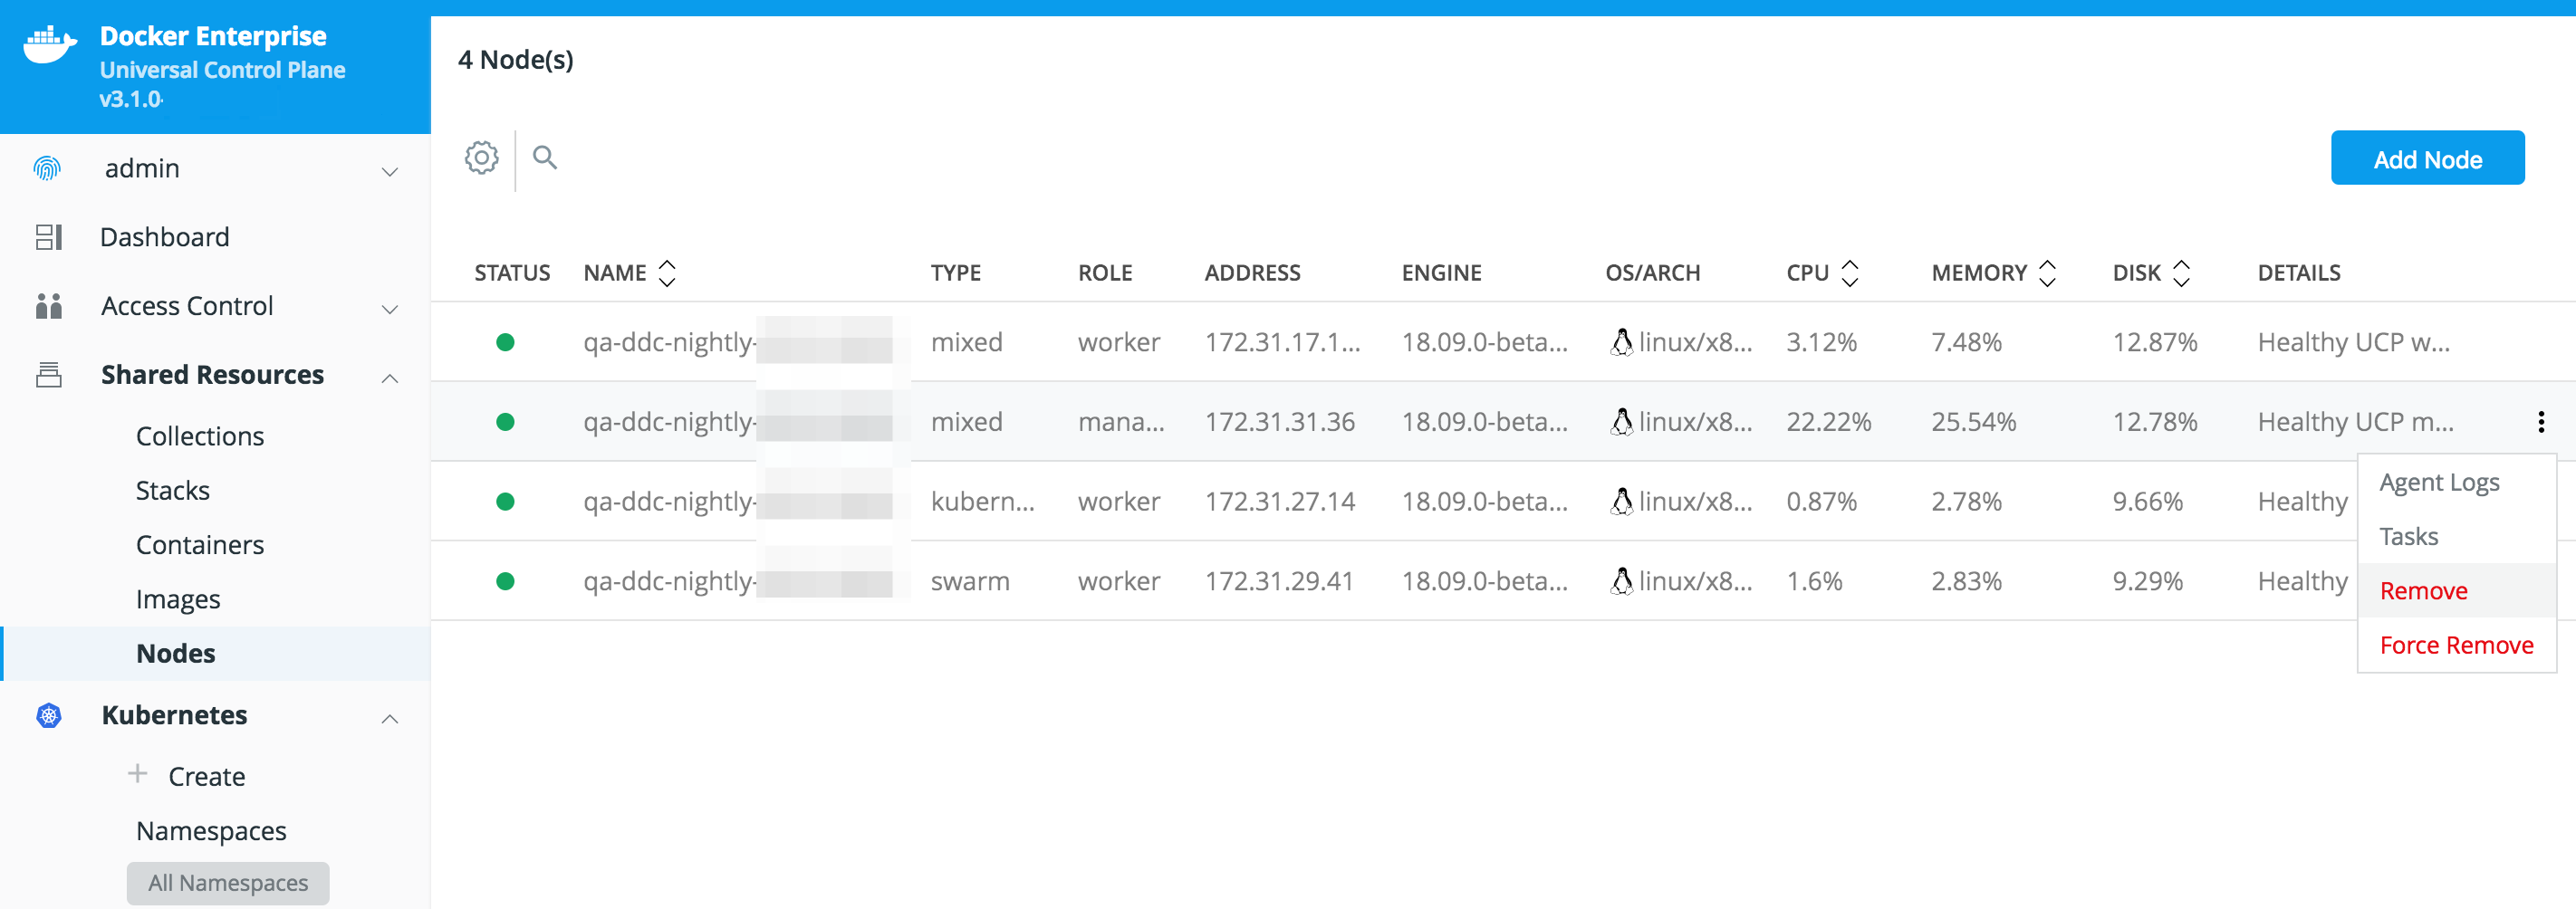
- Navigate to the Nodes page, and select the node.
- In the details pane, click Actions and select Remove.
- Click Confirm when prompted.
Removing manager nodes
Manager nodes are ingtegral to the cluster’s overall health, and thus you must be careful when removing one from the cluster.
- Confirm that all nodes in the cluster are healthy (otherwise, do not remove manager nodes).
- Demote the manager nodes into workers.
- Remove the newly-demoted workers from the cluster.
Use the CLI to manage your nodes
You can use the Docker CLI client to manage your nodes from the CLI. To do this, configure your Docker CLI client with a UCP client bundle.
Once you do that, you can start managing your UCP nodes:
docker node ls
Use the API to manage your nodes
You can use the API to manage your nodes in the following ways:
Use the node update API to add the orchestrator label (that is,
com.docker.ucp.orchestrator.kubernetes):/nodes/{id}/update
Use the /api/ucp/config-toml API to change the default orchestrator setting.