Managing Garbage Collection
Mirantis Secure Registry (MSR) supports garbage collection, the automatic cleanup of unused image layers. Effective management of storage resources is crucial for maintaining optimal performance in Mirantis Secure Registry (MSR). When images are deleted, the associated storage is not immediately reclaimed. To free up this space, you must perform garbage collection, which removes unreferenced blobs from the filesystem.
Running Garbage Collection
To initiate garbage collection in MSR:
Access the MSR Interface: Log in with an account that has system administrator privileges.
Navigate to Administration:
Click on the Administration tab.
Select Clean Up from the dropdown menu.
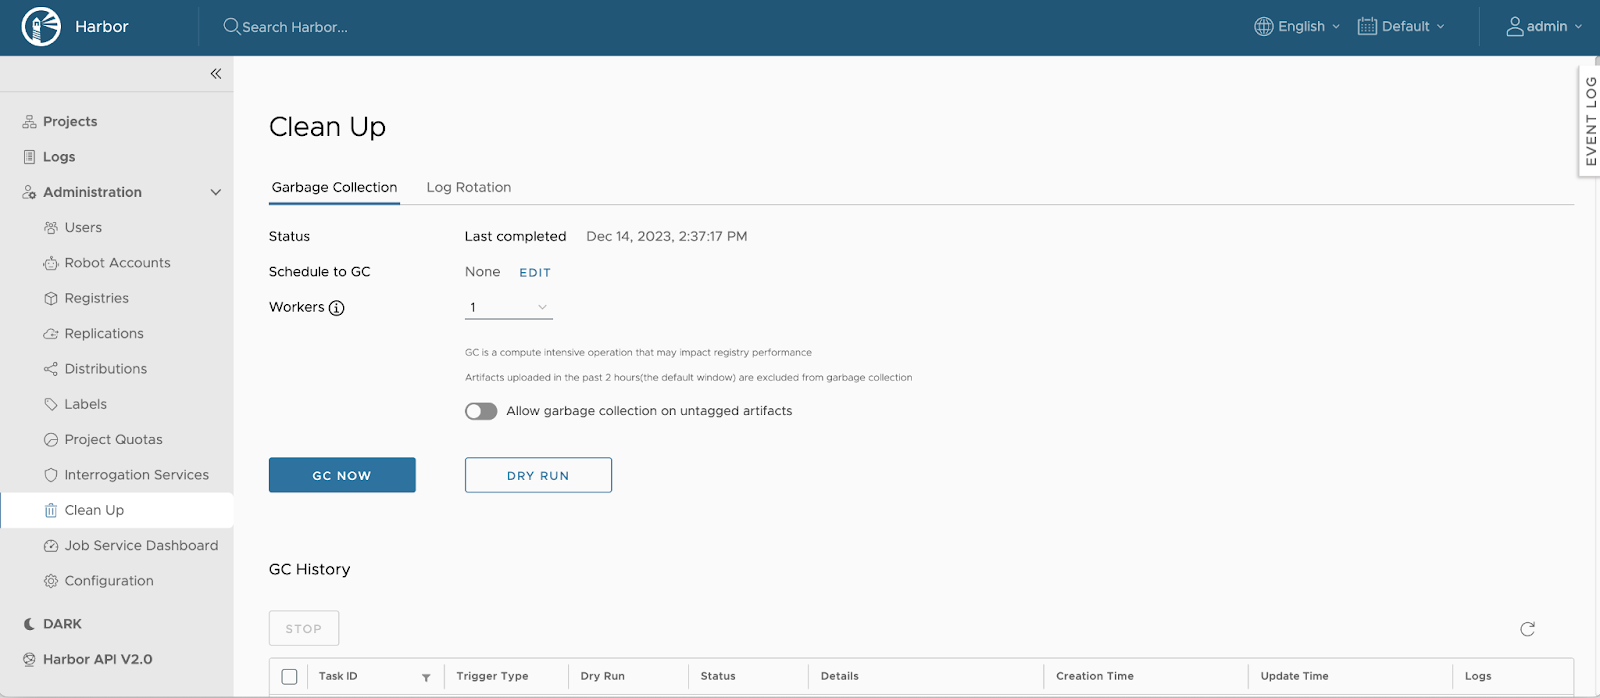
Configure Garbage Collection Settings:
Allow Garbage Collection on Untagged Artifacts:
To enable the deletion of untagged artifacts during garbage collection, select the checkbox labeled Allow garbage collection on untagged artifacts.
Dry Run Option:
To preview the blobs eligible for deletion and estimate the space that will be freed without actually removing any data, click DRY RUN.
Initiate Garbage Collection:
To start the garbage collection process immediately, click GC Now.
Note
MSR introduces a 2-hour time window to protect recently uploaded layers from being deleted during garbage collection. This ensures that artifacts uploaded within the last two hours are not affected. Additionally, MSR allows you to continue pushing, pulling, or deleting artifacts while garbage collection is running. To prevent frequent triggering, the GC Now button can only be activated once per minute.
Scheduling Garbage Collection
To automate garbage collection at regular intervals:
Access the Garbage Collection Tab:
Navigate to Administration > Clean Up.
Select the Garbage Collection tab.
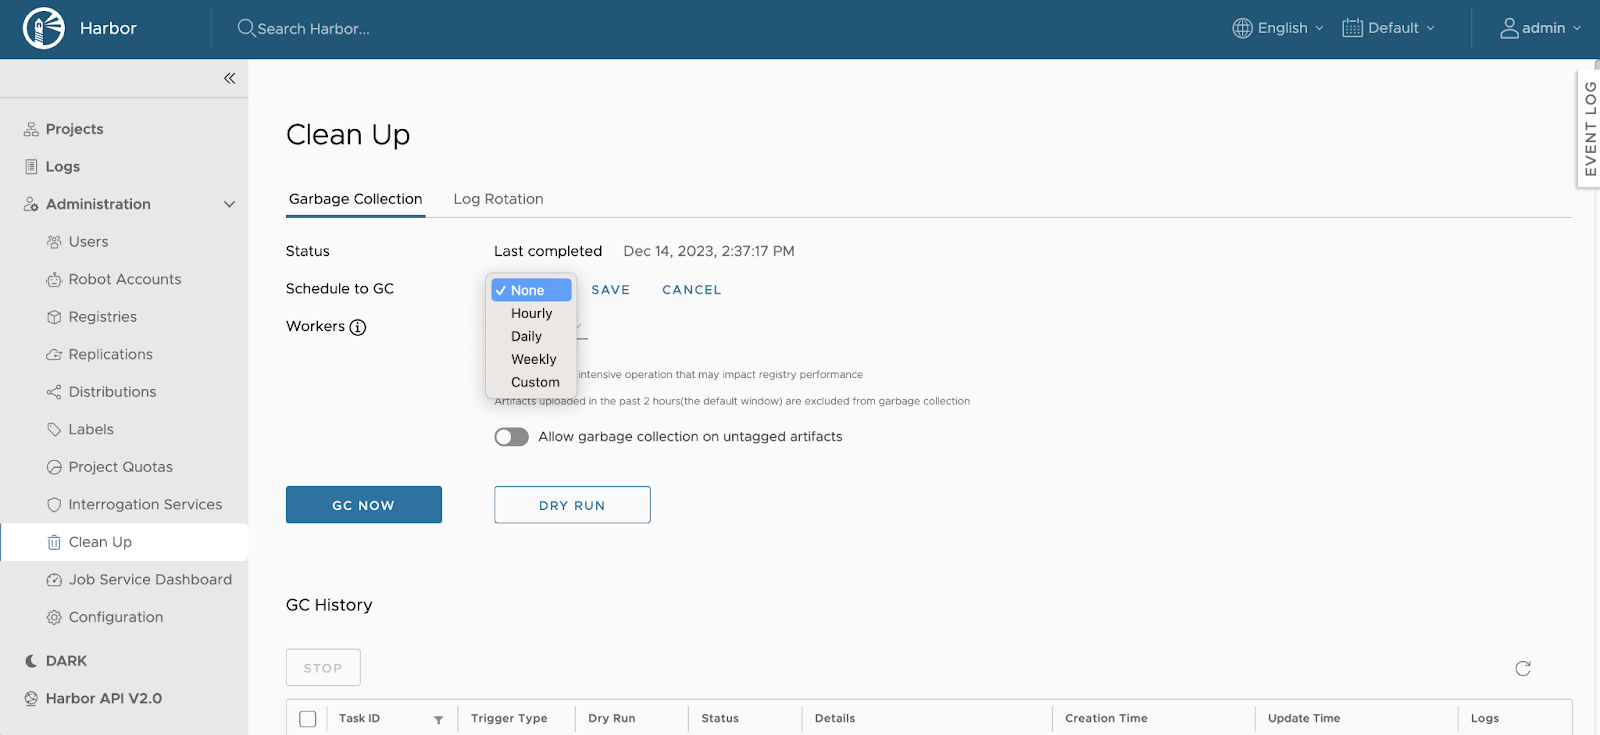
Set the Schedule:
Use the dropdown menu to choose the desired frequency:
None: No scheduled garbage collection.
Hourly: Runs at the beginning of every hour.
Daily: Runs at midnight every day.
Weekly: Runs at midnight every Saturday.
Custom: Define a custom schedule using a cron expression.
Enable Garbage Collection on Untagged Artifacts:
If you want untagged artifacts to be deleted during the scheduled garbage collection, select the checkbox labeled Allow garbage collection on untagged artifacts.
Save the Configuration:
Click Save to apply the changes.
Viewing Garbage Collection History
To monitor past garbage collection activities:
Access the Garbage Collection History:
Navigate to Administration > Clean Up.
Select the Garbage Collection tab.
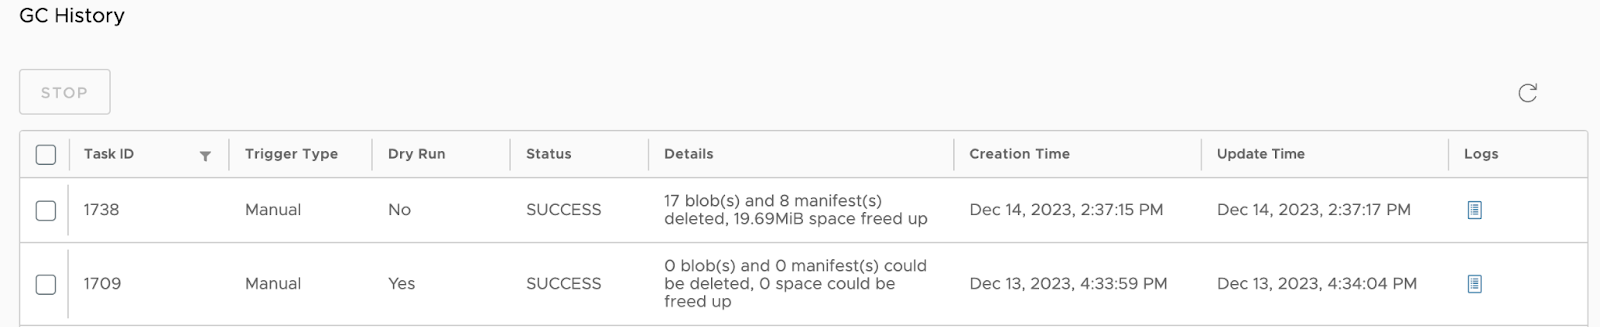
Review the History Table:
The table displays the following information for each run:
Job ID: Unique identifier assigned to each run.
Trigger Type: Indicates whether the run was initiated manually or by schedule.
Dry Run: Specifies if the run was a dry run.
Status: Current status of the run.
Creation Time: Timestamp when the run started.
Update Time: Timestamp of the last update.
Logs: Links to logs generated by the run, including estimates of artifacts that will be garbage collected during a dry run.
Stopping an In-Progress Garbage Collection
To halt a running garbage collection job:
Access the Garbage Collection History:
Navigate to Administration > Clean Up.
Select the Garbage Collection tab.
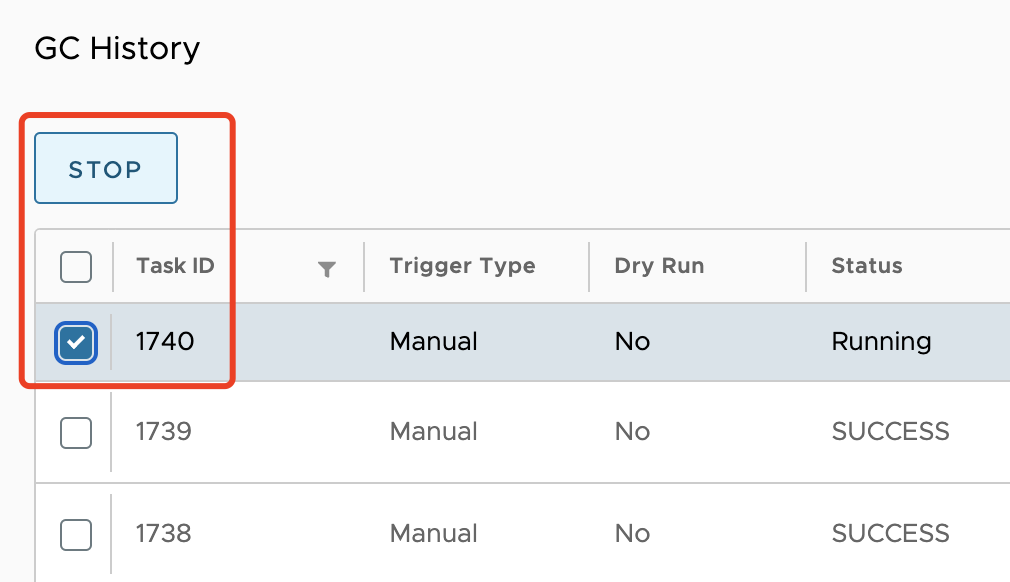
Select the Running Job:
In the history table, check the box next to the Job ID of the running garbage collection you wish to stop.
Stop the Job:
Click Stop.
Confirm the action in the modal that appears.
Caution
Stopping a garbage collection job will prevent it from processing additional artifacts. However, any artifacts that have already been garbage collected will not be restored. By following these procedures, you can effectively manage storage resources in Mirantis Secure Registry, ensuring optimal performance and efficient use of space.